
Garden Windows Mini Quilt // Tutorial


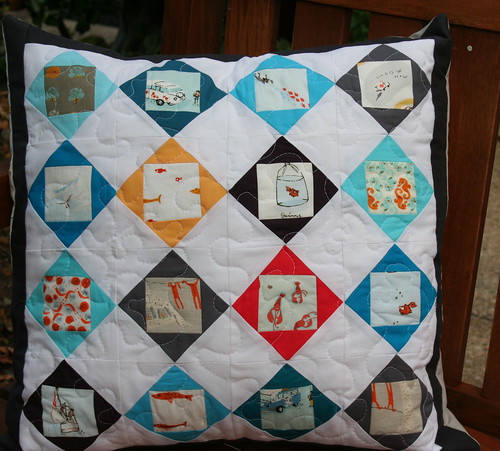
I put together a simple tutorial for the block used in Garden Windows, a quilt I made a few weeks ago using Laura Gunn's new fabric line, Garden Wall. I also used the same pattern for my Pillow Talk {Swap} pillow (both projects pictured below). It works really well for showcasing feature fabrics! I love seeing how fabric choices can change the look of a project (and I didn't have time to take pictures while making the first quilt, AND I love Echo by Lotta Jansdotter), so I decided to make a mini-quilt using the same pattern. This doll quilt will be a Christmas present for my 2-year-old . . . she L-O-V-E-S her babies right now :)

Free Download: Garden Windows Project Sheet
Garden Wall Tutorial
This 4 block mini-quilt is made using a 9'' version of the 12'' Garden Windows block. Please refer to the project sheet (link above) for 12'' block cutting instructions and yardage requirements for a baby, lap, or throw quilt. I used Echo by Lotta Jansdotter and a gray Pure Elements solid for this mini-quilt.
Cutting

Tip: Press all fabric using Best Press or spray starch. There are a lot of bias edges in this quilt, and this will increase accuracy in piecing.
Fabric A (feature prints) (4) 5'' squares
Fabric B (solids or near solid) (4) 5 3/4'' squares, cut on diagonal twice to form 4 additional squares
Fabric C (neutral solid) (8) 5 3/8'' squares, cut in half on diagonal to form 2 squares
Block Construction
 The hardest thing about patterns that are set "on point" is figuring out the size of the setting triangles. Since you don't have to do the math, making this block is a piece of cake! The block construction is simple, illustrated by the 4 pictures to the left. Sew 4 triangles to the charm square. Press. Sew 4 setting triangles onto diamond. Press. Once you have done that, sew the blocks together, and voila!
A tip: make sure to pin & sew your blocks together carefully (don't rush through it like I did!). With this many bias edges, it is easy for blocks to get warped.
I have included a few more tips in the form of pictures. I am usually overly verbose, so I decided to simplify this time around.


Tada! You are done with your first block. I think I'm going to practice hand quilting on my new "mini."

Sew blocks, together, matching points and edges.

Linked up at Quiltstory and WIP Wednesday