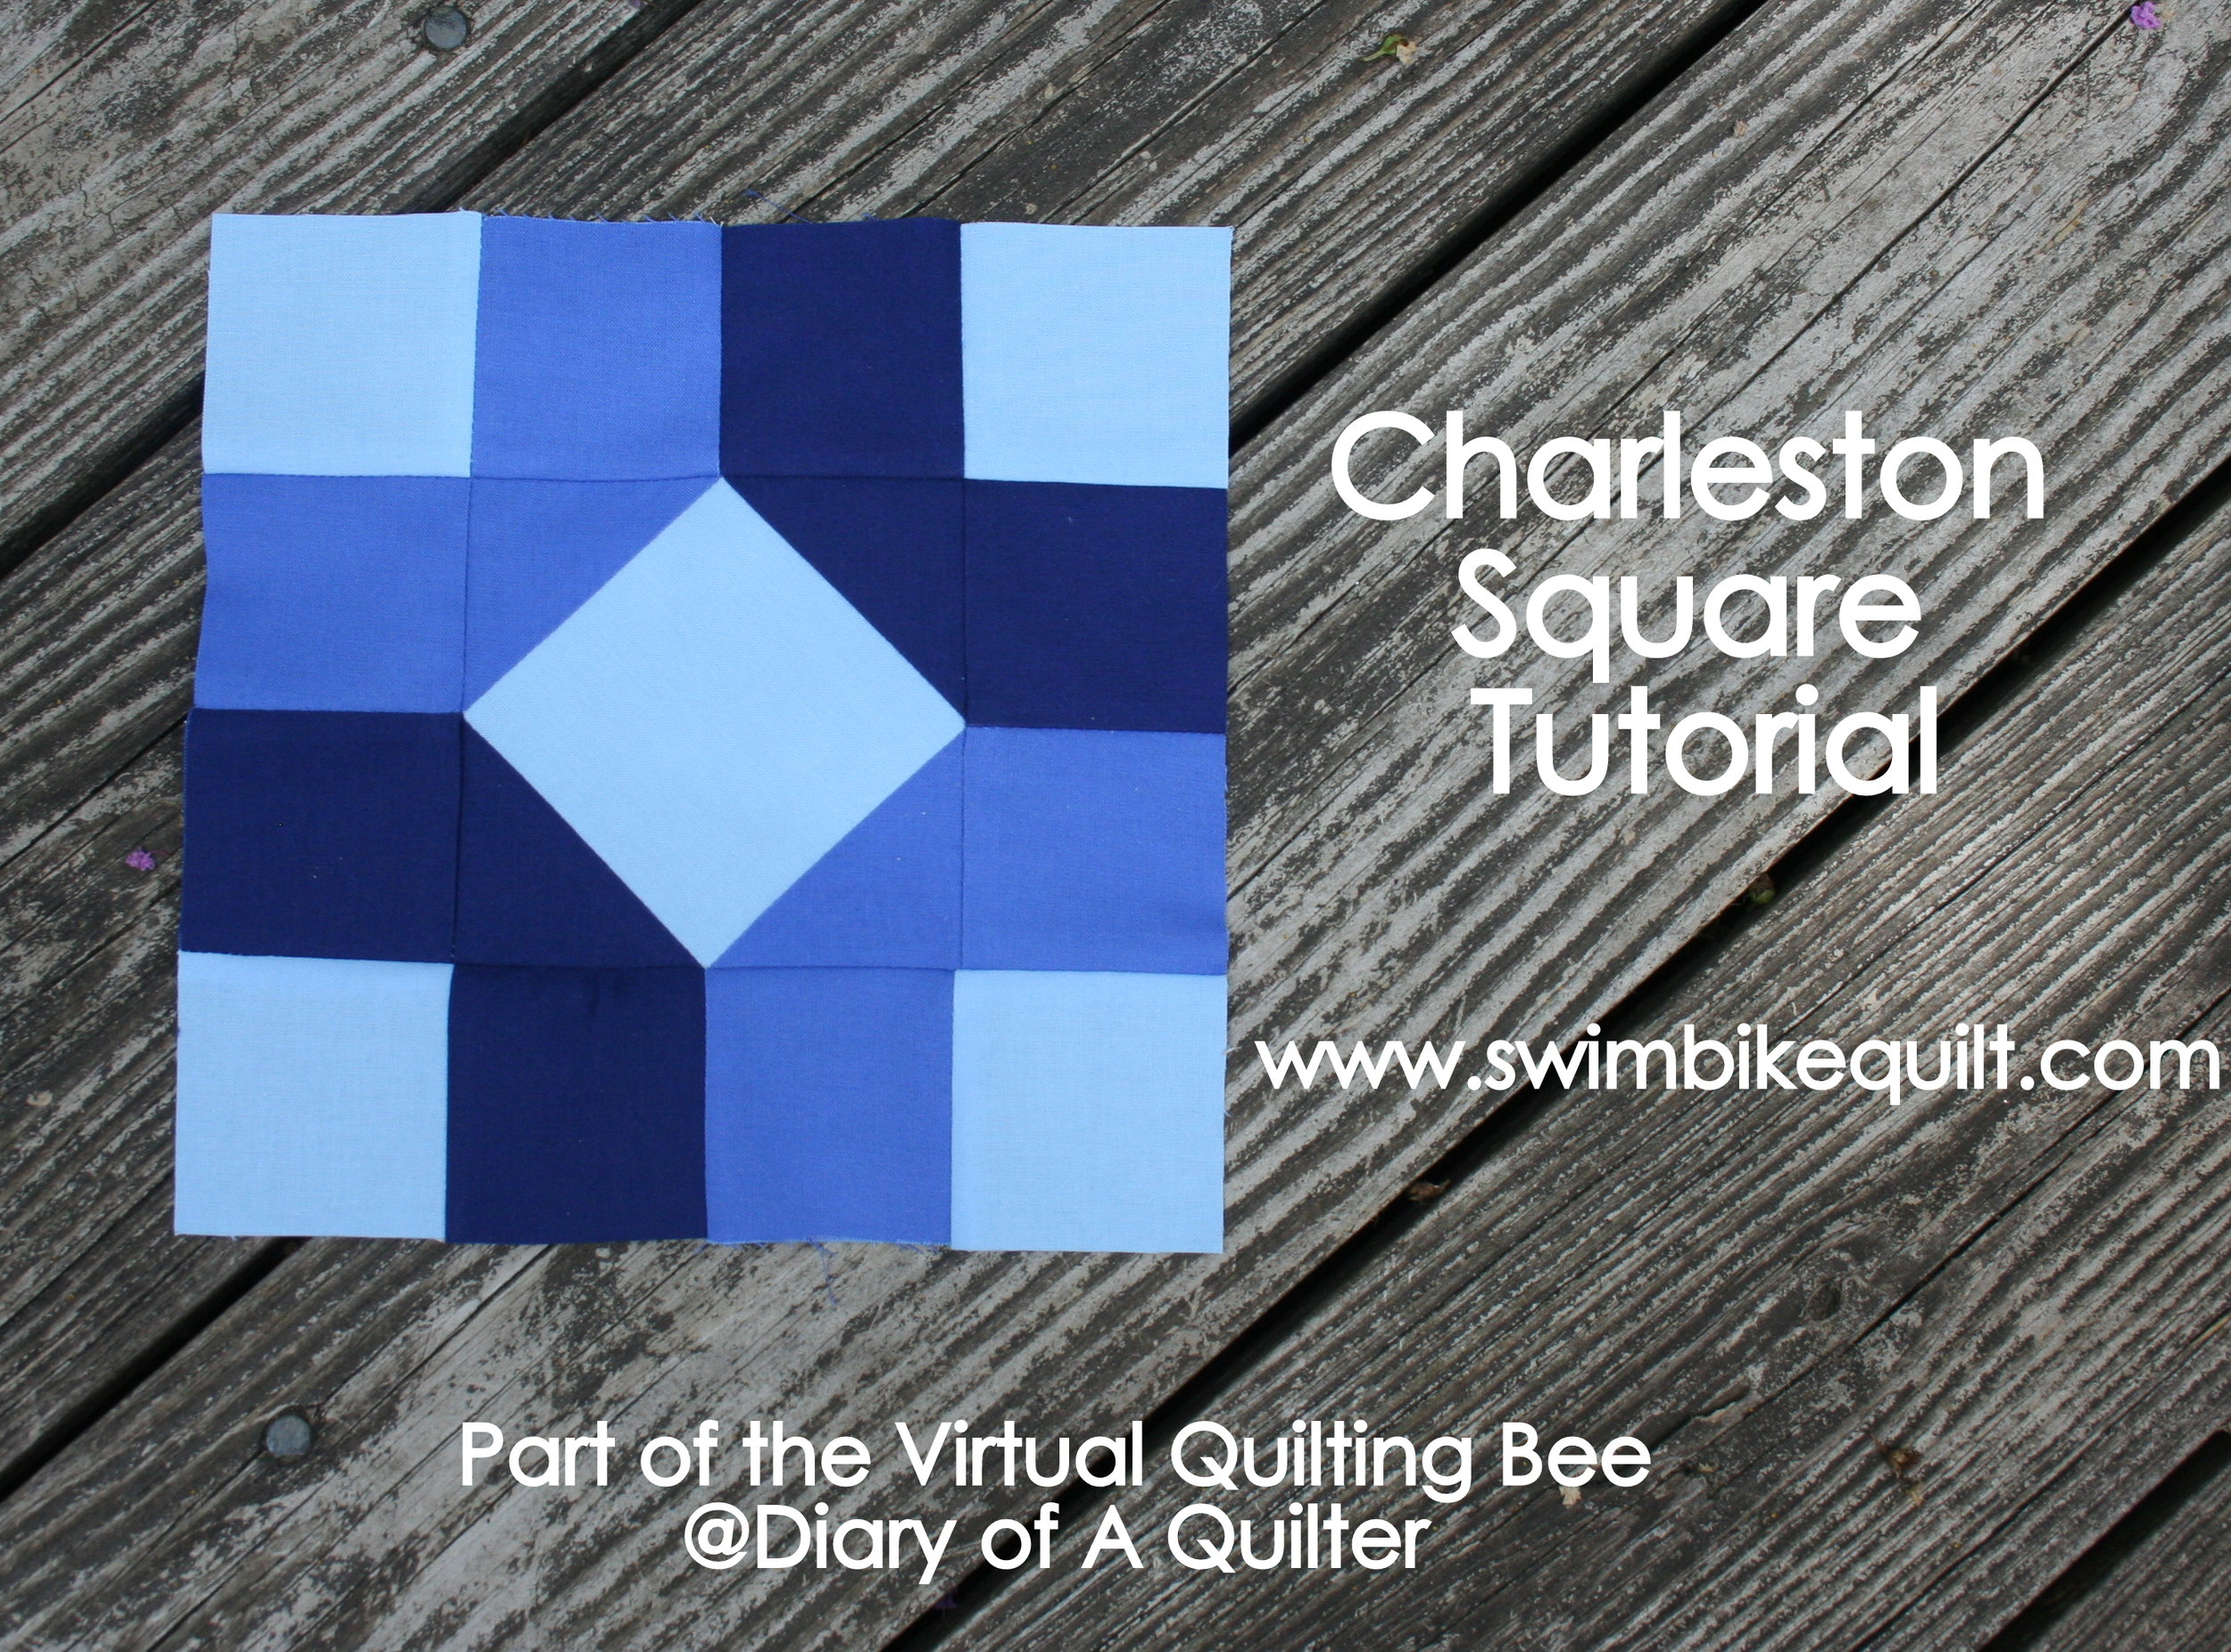
Charleston Square Block Tutorial

 Today I am sharing a quilt block tutorial as part of the Virtual Quilting Bee, hosted by Amy Smart from Diary of A Quilter. I love Amy and wish I lived down the street from her (true story). Anyway. Charleston Square is an 8'' block--it is simple to sew together and looks especially striking in solids.

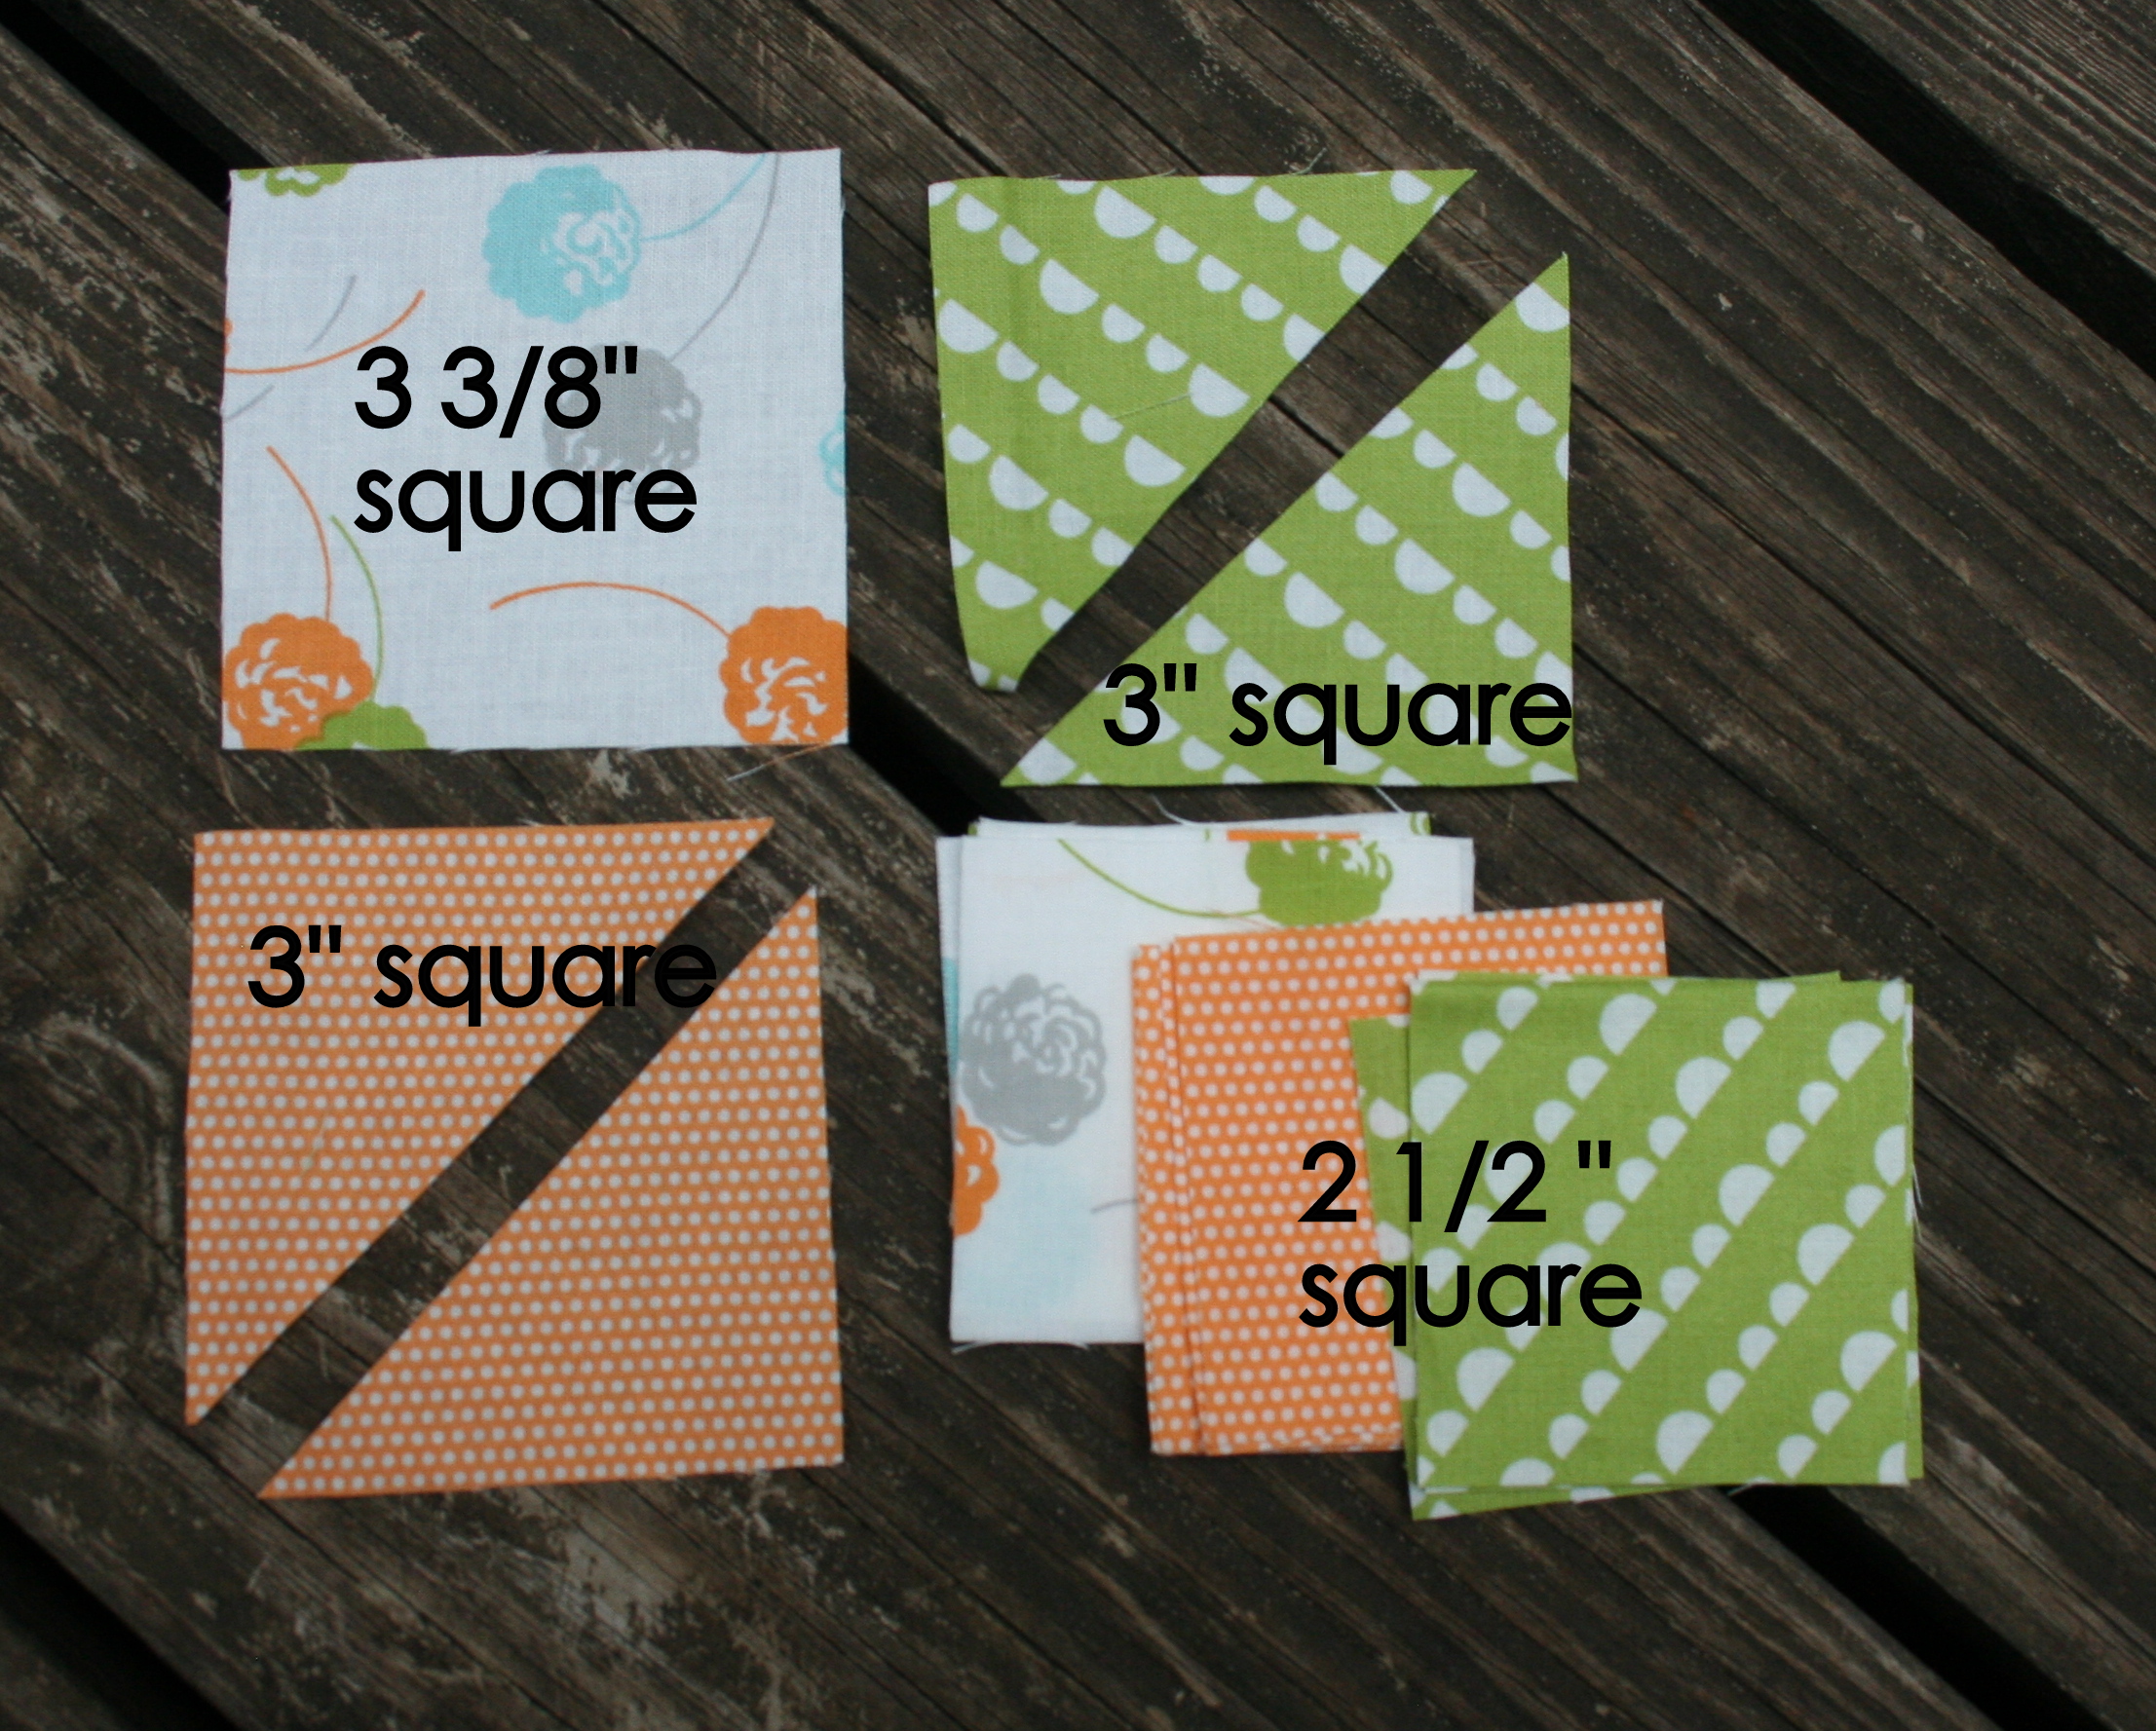
Cutting Instructions for 8'' Charleston Square Block (8 1/2'' unfinished)Note: Instructions are included for the Happy Go Lucky fabric and blue solids, both shown hereUse a 1/4'' seam; I used a scant 1/4'' seam (just slightly less than 1/4'') to sew the rows of individual squares together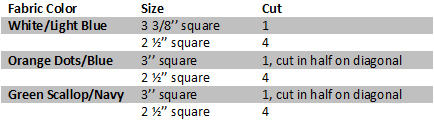 1. Cut squares and triangles according to the cutting diagram above; make sure to cut the two 3'' squares in half along the diagonal.
 3. Place one triangle face down on a side of the diamond--make sure that the triangle dog ears overlap the diamond 1/4'' on each side. Sew the triangle to the square using a 1/4'' seam. Repeat with a triangle of the same color on the opposite side. Note: You may wish to use spray starch or starch alternative on the diamond and triangles, since you are sewing on the bias.
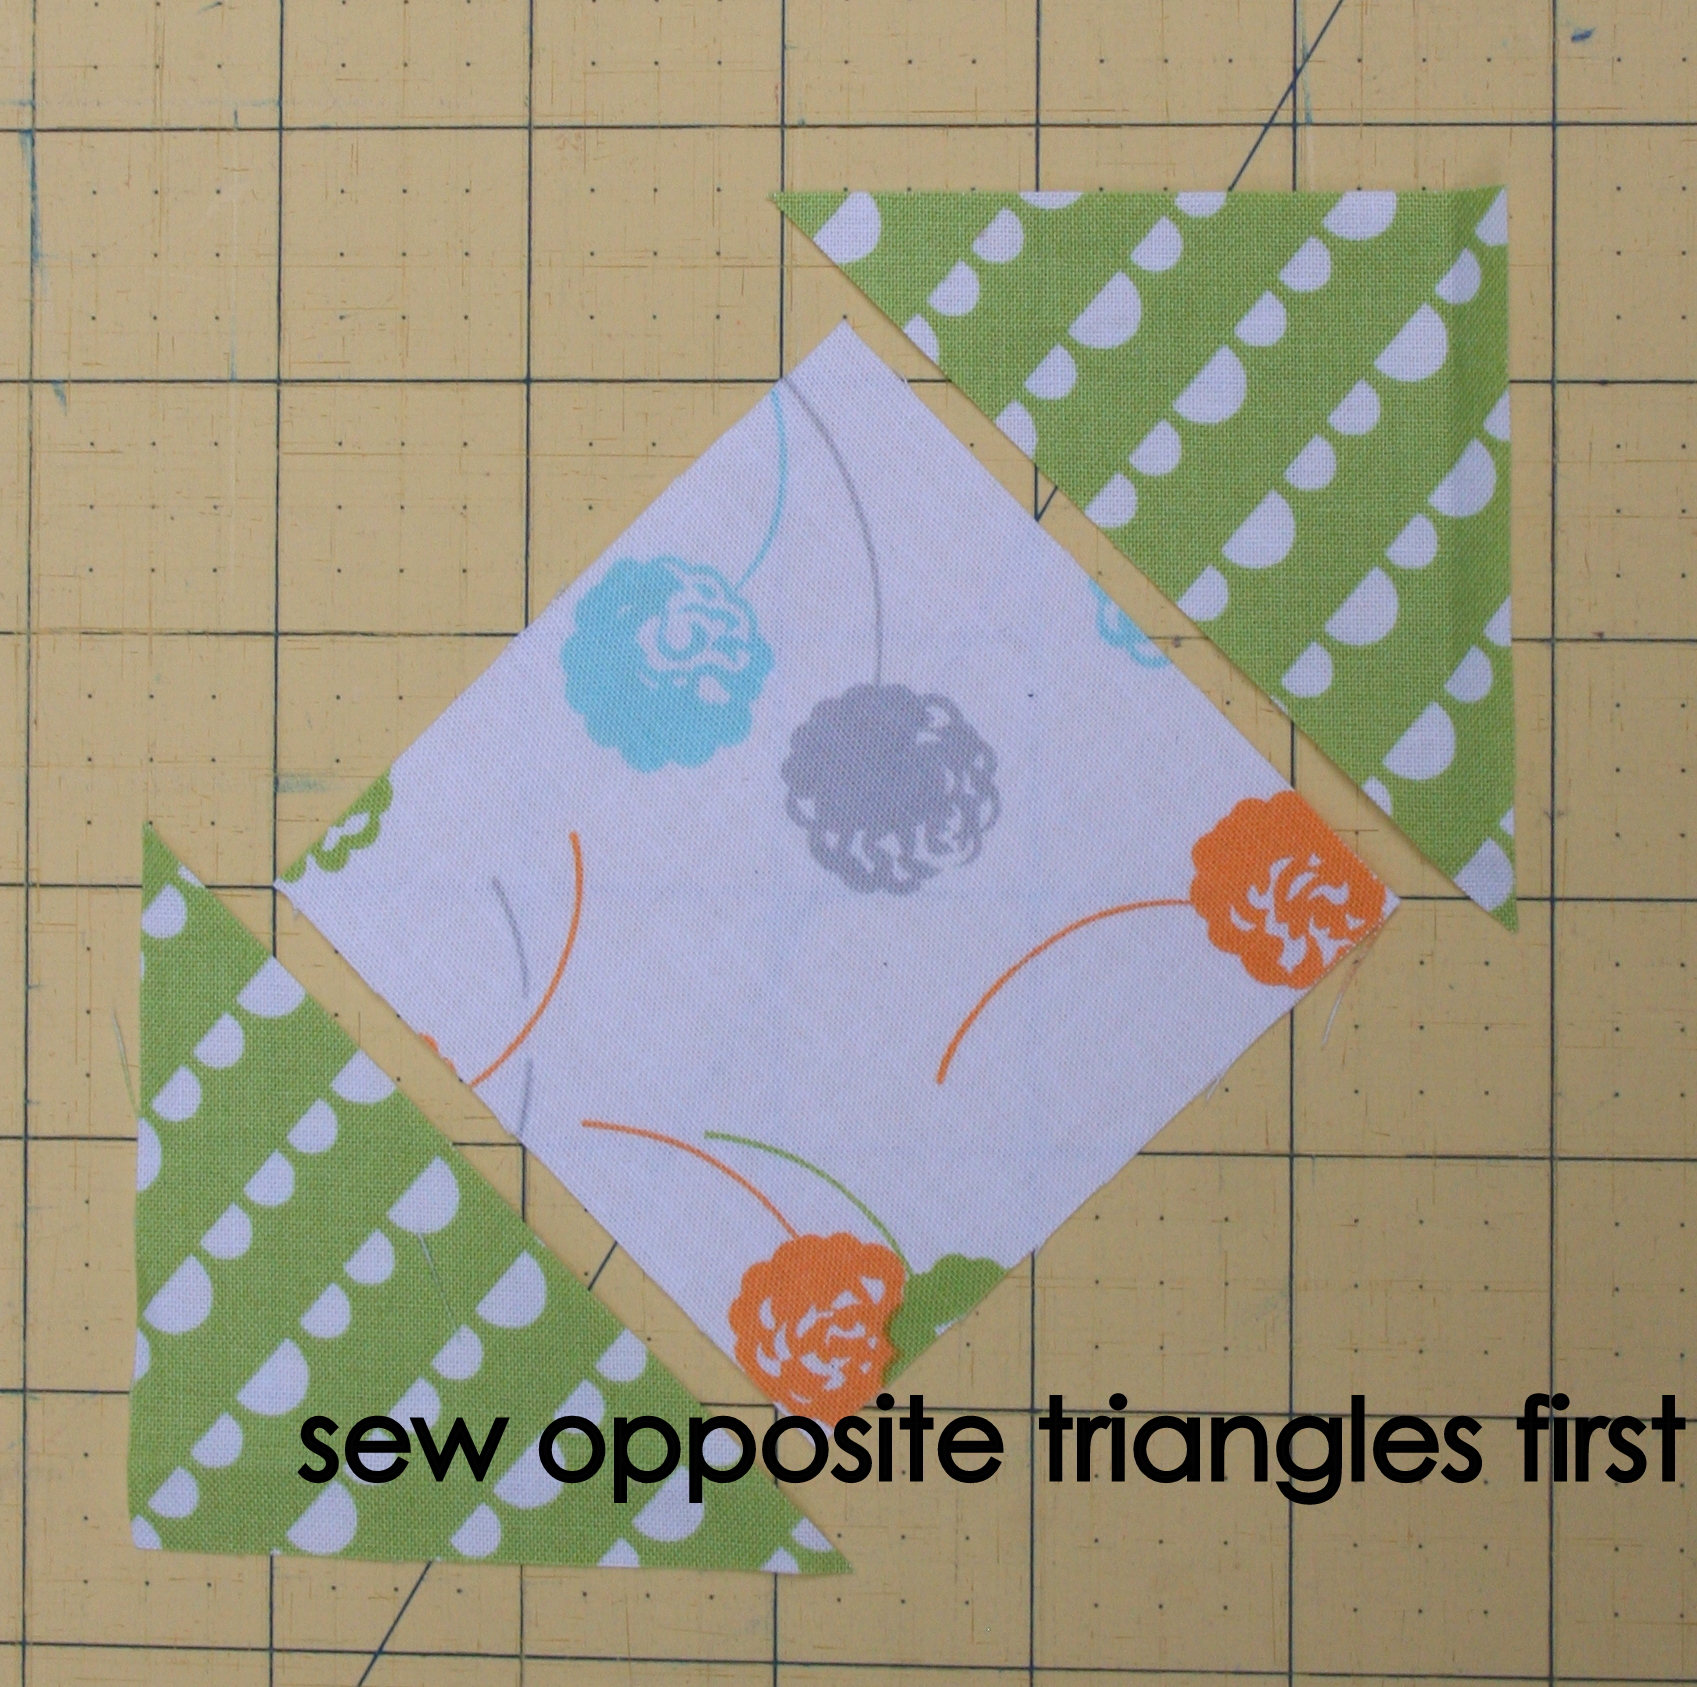 4. Press block open; I press to the darker fabric, you may prefer to press seams open.
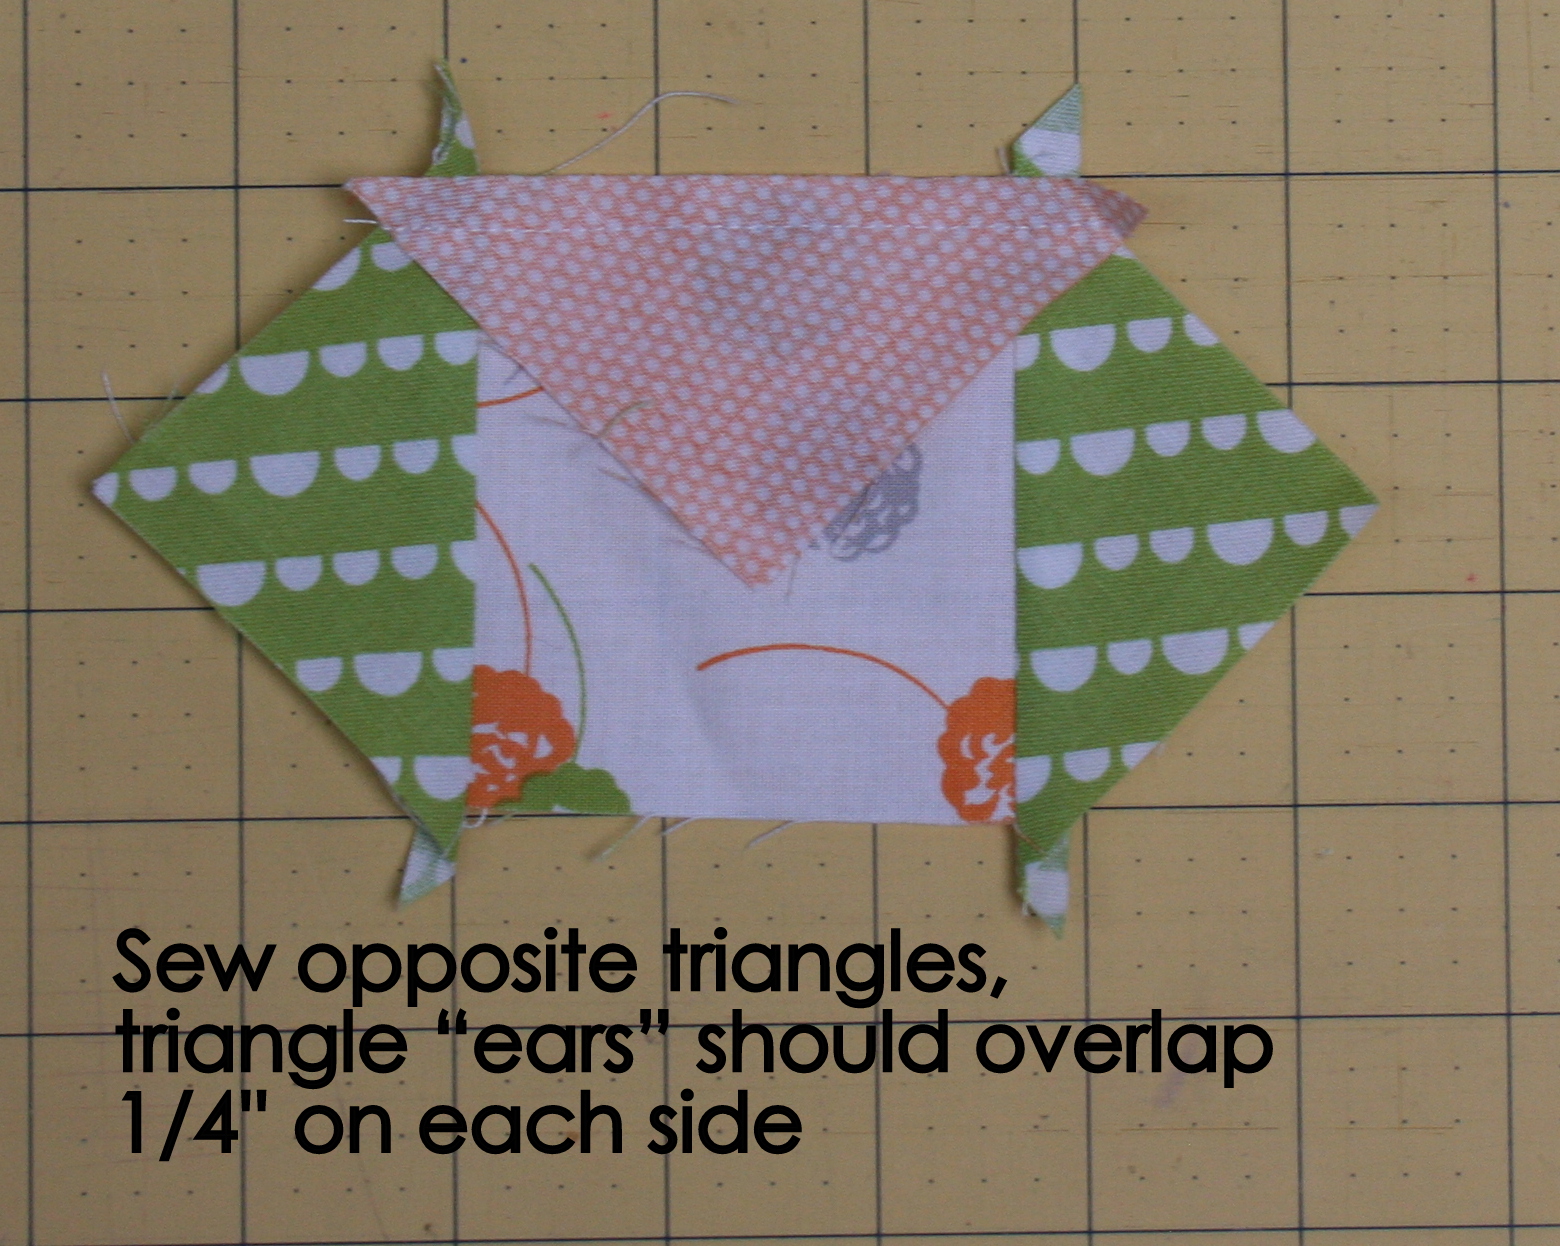 5. Repeat steps 3 and 4 with the remaining two triangles. Open the triangles so it forms a square and press seams well. Note: Your block may be slightly larger than 4 1/2'' at this point. Please trim so that it is 4 1/2'' square (if necessary). Pay attention to the corners where the diamonds and triangles meet--you should leave a 1/4'' seam from those points to the edge of the square. See picture below.
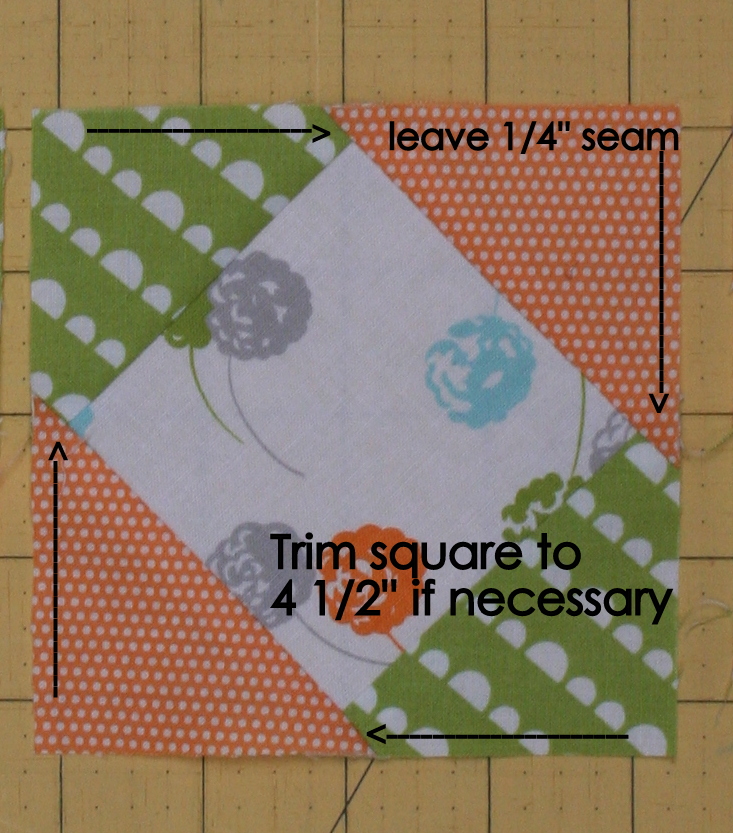 6. Once you have sewn the inner diamond and triangles together to form a square, sew the top row of squares together. Then sew the bottom row of squares together. Press seams. I used a scant 1/4'' seam here.
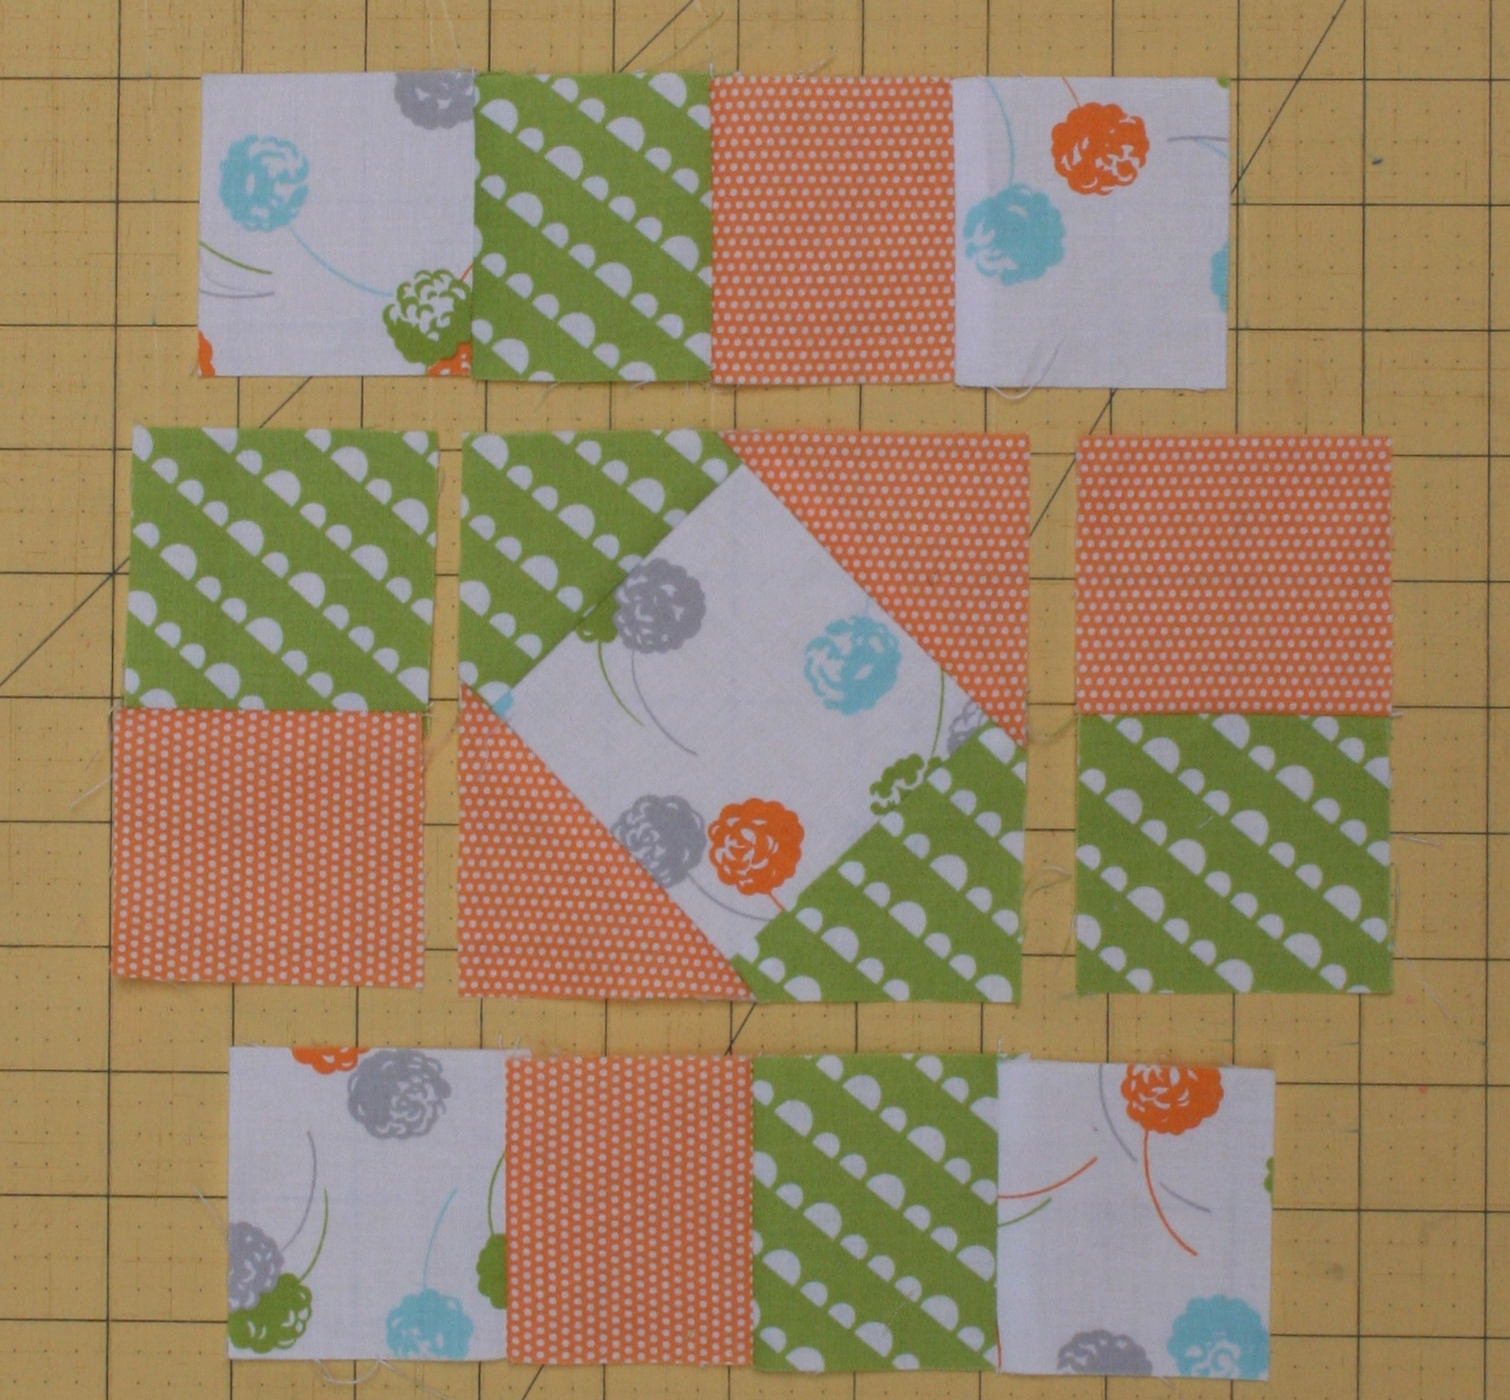 7. Sew the two sets of (2) side squares together (in the picture above, that is the orange and green squares to the left and right of the center square). Press seams.8. Sew one set of side squares to the left side of the center square. Make sure to pin, sew, and press well. Repeat with the set of squares on the right side of the center square.
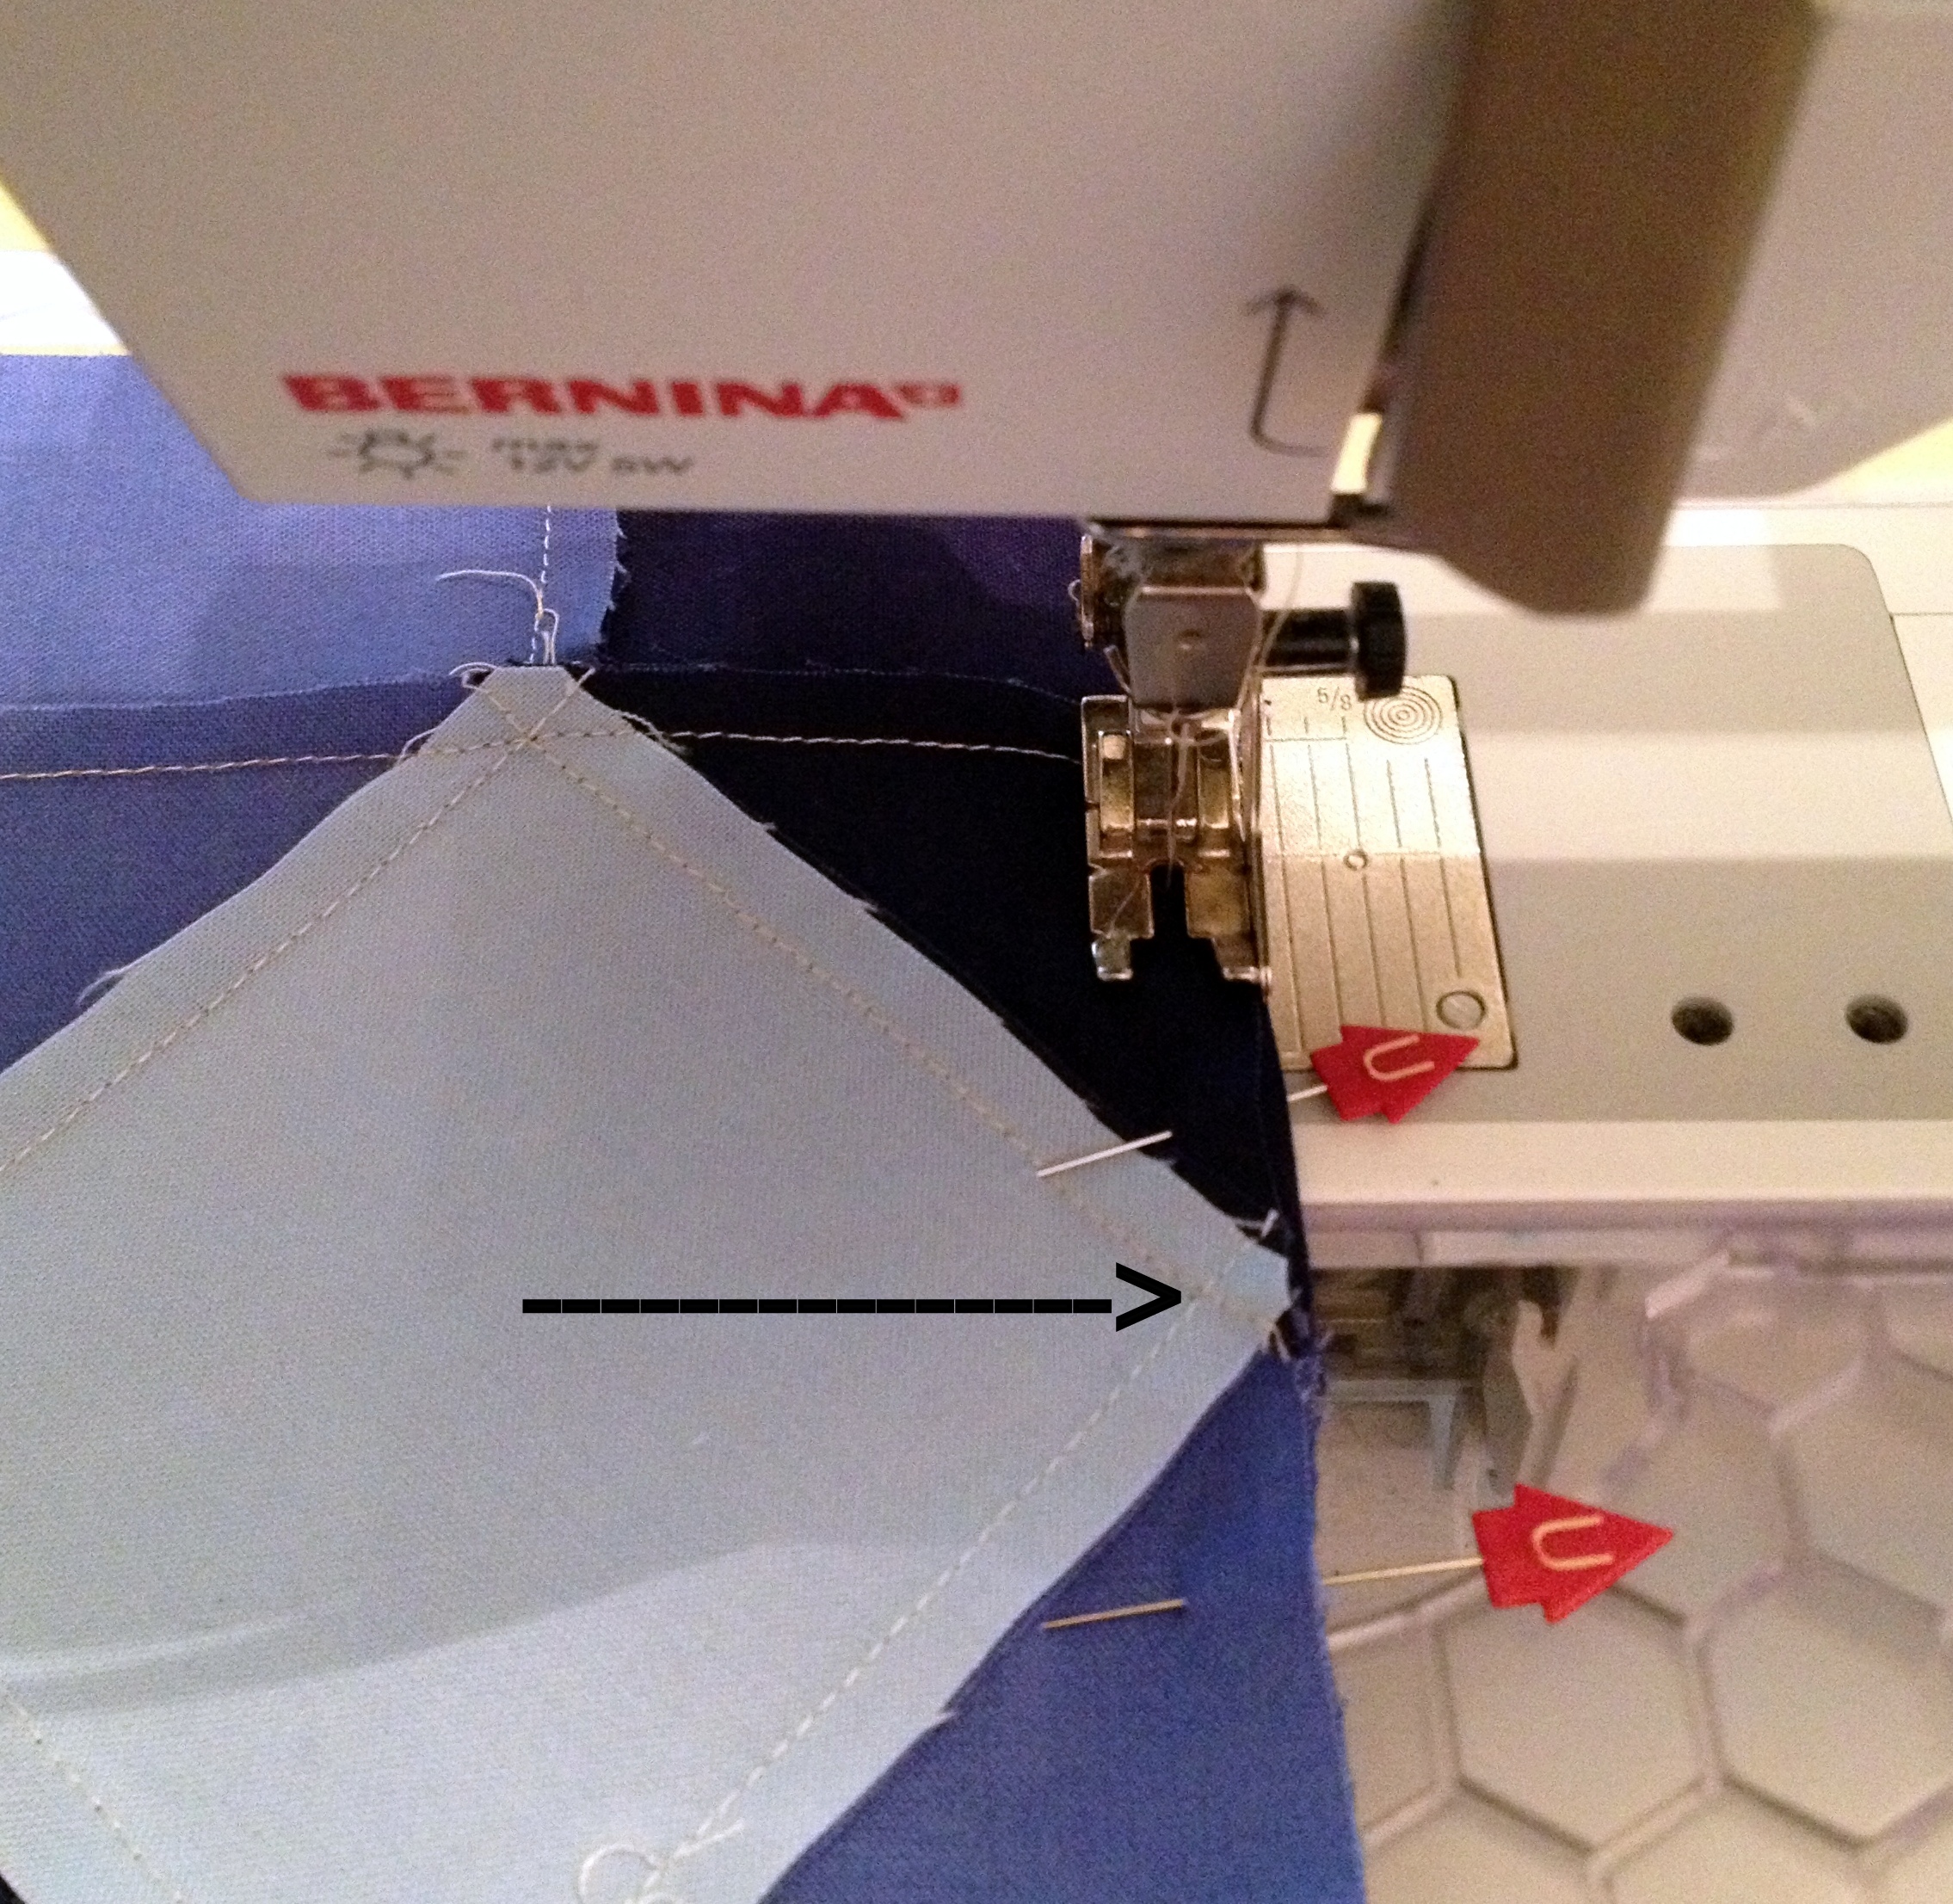 Sewing Tip: When I sew squares to a diamond-in-the-square center square, I always put an anchor pin (not shown) through both layers of fabric at the intersection of the seams, indicated with the arrow. I then pin on either side of the anchor pin and remove it. With the wrong side of the center square face up, I stitch the side squares to the center square with a 1/4'' seam. This way, I can see exactly where I need to sew sand make sure my needle goes through the seam intersection without cutting off my points. 9. Sew the 3 rows together--make sure to pin, sew, and press well.
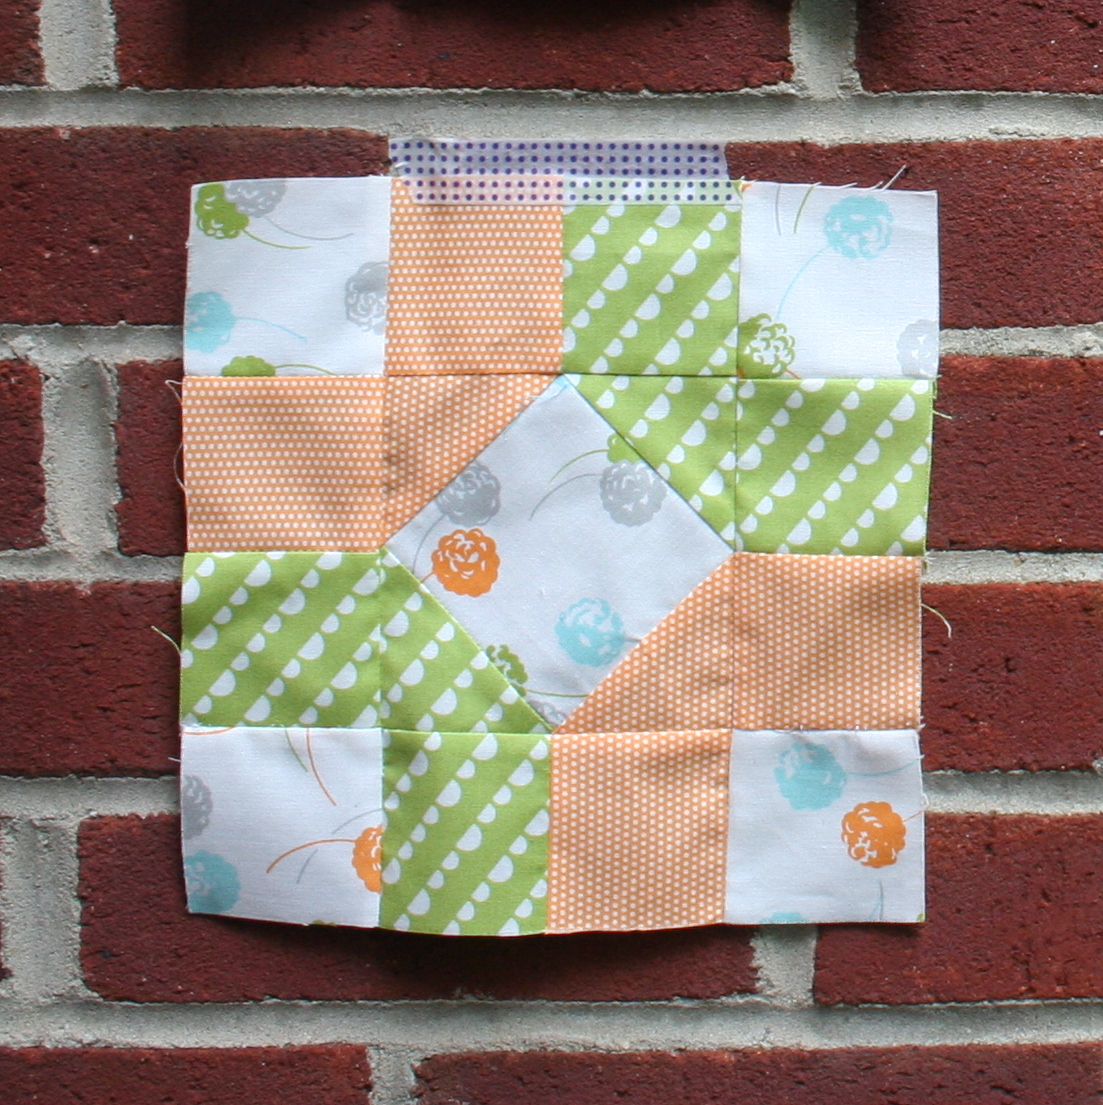 Please leave me a comment if you have any questions. Don't forget to check out the previous 11 blocks in this series on Amy's Virtual Quilting Bee Page--there are some really fun ones! Eventually, the plan is to make these blocks in a sampler quilt similar in style to the one that she made in 2012 (of course with different blocks). Also, check out some great posts associated with the bee: Essential Quilting Supplies, Choosing Fabric, and Quilt Making Technique Basics.