Machine Binding Tutorial

Machine Binding Tutorial by Katie Blakesley swimbikequilt.com
There are multiple ways to bind the quilt entirely by machine, and I think I have tried them all. I provide links to some alternate methods at the end of the tutorial. I still bind some of my quilts by hand, but for many of them, especially quilts I am donating, this is my binding method of choice.
I hand bind most of my quilts, or rather, over the last few years, my mom has been awesome and hand bound a number of my quilts! She is precise and enjoys binding them, I’m so grateful. Hand binding seems to get the most precise results for the largest number of people.

Sometimes, however, I don't have time for hand stitching, or I simply want the durability and efficiency of binding a quilt by machine.
This tutorial shares how I bind quilts entirely by machine. I first posted it in 2011, and I have bound a lot of quilts over the years! Binding by machine takes patience and practice to get a professional looking finish. If you are a speedy (and perhaps less careful than others) sewist, like me, you will want to slow down a bit.

Tip
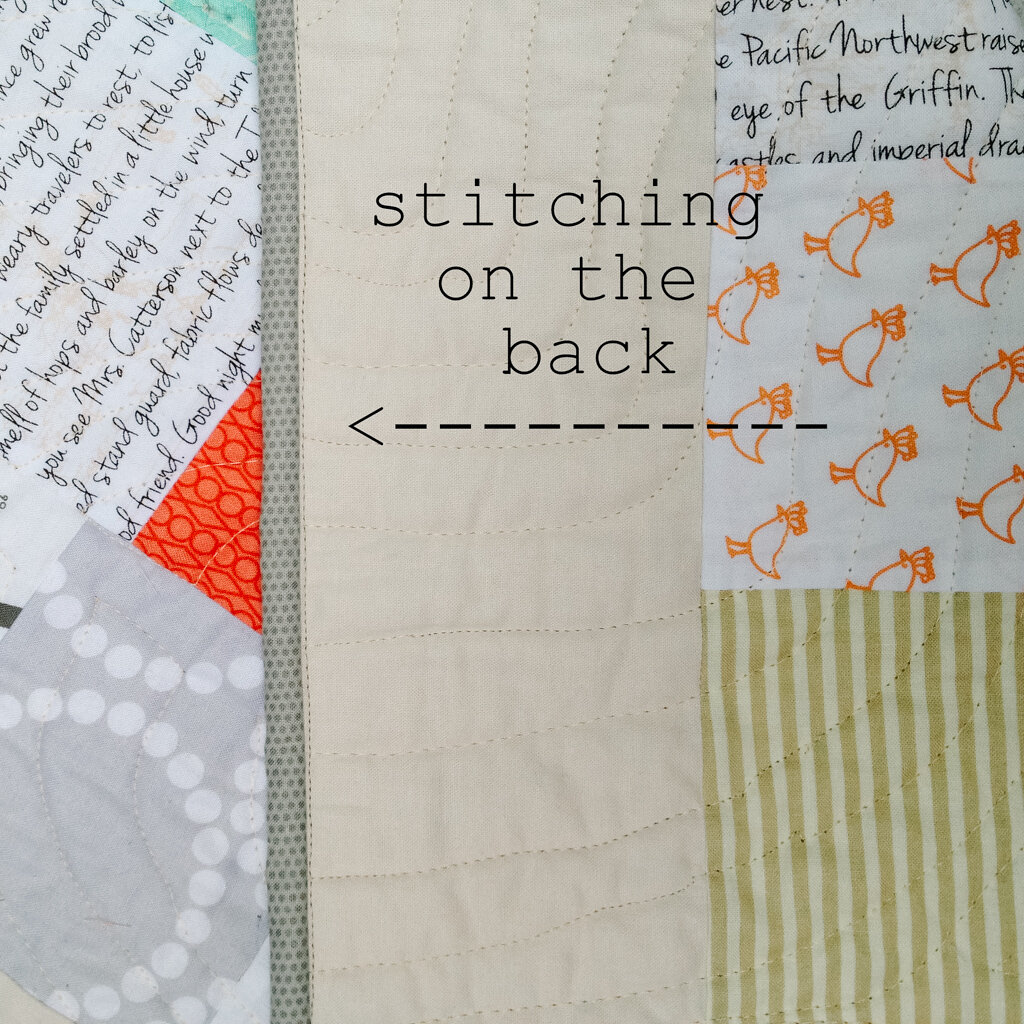
Choose a binding that matches the back of your quilt-- i.e. if I'm using a dark binding, I like to use a darker quilt back. The quilt above was backed in a black minky, and I had planned to use black binding, but then I found this stripe. Sometimes you have to go with what the quilt needs—I slowed down a bit more and was a bit more careful :)
MACHINE BINDING TUTORIAL
Make the Binding
[These are instructions for creating straight-grain binding.]
1. Measure the height and width of your quilt. Multiply that number by 2, and add 12 inches. This is the length of binding you need to make (for example: a quilt that is 48’’ x 60’’ = (48’’ + 60”) x 2, + 12 = 228’’ of binding. Or use the Robert Kaufman Quilting Calc to determine the binding length!
2. Cut your strips 2.25'' or 2.5'' x the width of fabric (WOF). Note: I almost always include a splice of color somewhere in the binding, so gather a scrap or two if you would like.
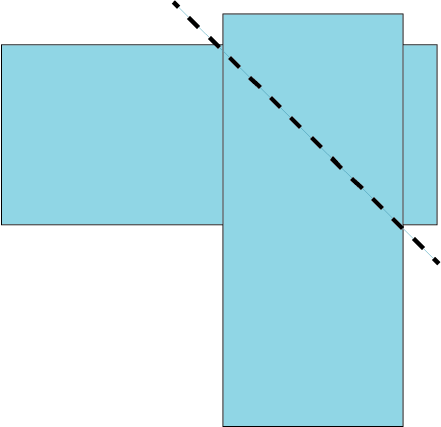
3. Place two strips right sides together, with the ends at a 90 degree angle.
4. Mark a 45 degree, diagonal line, on and stitch along the line.
5. Repeat with remaining strips.
6. Press all seams, and trim them to a 1/4'' seam allowance.
7. Fold the binding in half and press along the length of the entire binding.
Attach the Binding to the Back of Quilt

1. Choose a spot to start attaching the binding to the BACK of the quilt (I start 2/3 down the right side of the quilt).

2. Arrange the binding around the edge of the quilt. Verify that it is long enough, and also make sure that none of the seams are within a few inches of the corner. It is difficult to miter a corner on a seam.
3. I sew the binding to the back of the quilt first; this means the stitches on the front of the quilt will be beautiful! Lay the unfinished edge of the binding against the edge of the BACK of your quilt. Measure 8-12 inches from the start of the binding, and start your stitching at this point (be sure to backstitch). Stitch the binding to the back of the quilt.
Note: You can use a 1/4'' foot, a "regular" sewing foot, or a walking foot to do this step.
4. When you are 1/4 inch from the corner, stop stitching. Rotate the quilt 90 degrees, and stitch off the side of the quilt.


5. To miter the corners, rotate your quilt so the sewn binding is at the top (as shown). Fold binding up 90 degrees. Press and pin.
6. Next, fold the binding back down and press. Start stitching at the top of the binding/quilt, and stitch down side of quilt.
7. Repeat for the remaining 3 corners and sides. On the last side, stop stitching 6 inches from the start of the binding and backstitch.
Join the Binding Ends:

1. Align the binding against the edge of the quilt, and overlap the binding ends.2. If you used a 2.25'' width binding, overlap the ends by 2.25'' and mark. If you used a 2.5'' width binding, overlap the ends by 2.5'' and mark.
3. Trim the binding ends so that they overlap the proper length (2.25'' or 2.5'').
4. Place the two strips right sides together, with the ends at a 90 degree, just as you did when making the binding.
5. Mark a diagonal line and stitch along the line.
6. Place the binding against the quilt back to make sure it fits snugly. If it is too loose, unpick, remeasure, and re-sew. When it fits well, press, trim the seam allowance, and sew the remaining binding to the quilt, making sure to back stitch at both ends.
Stitch Binding To Front of Quilt
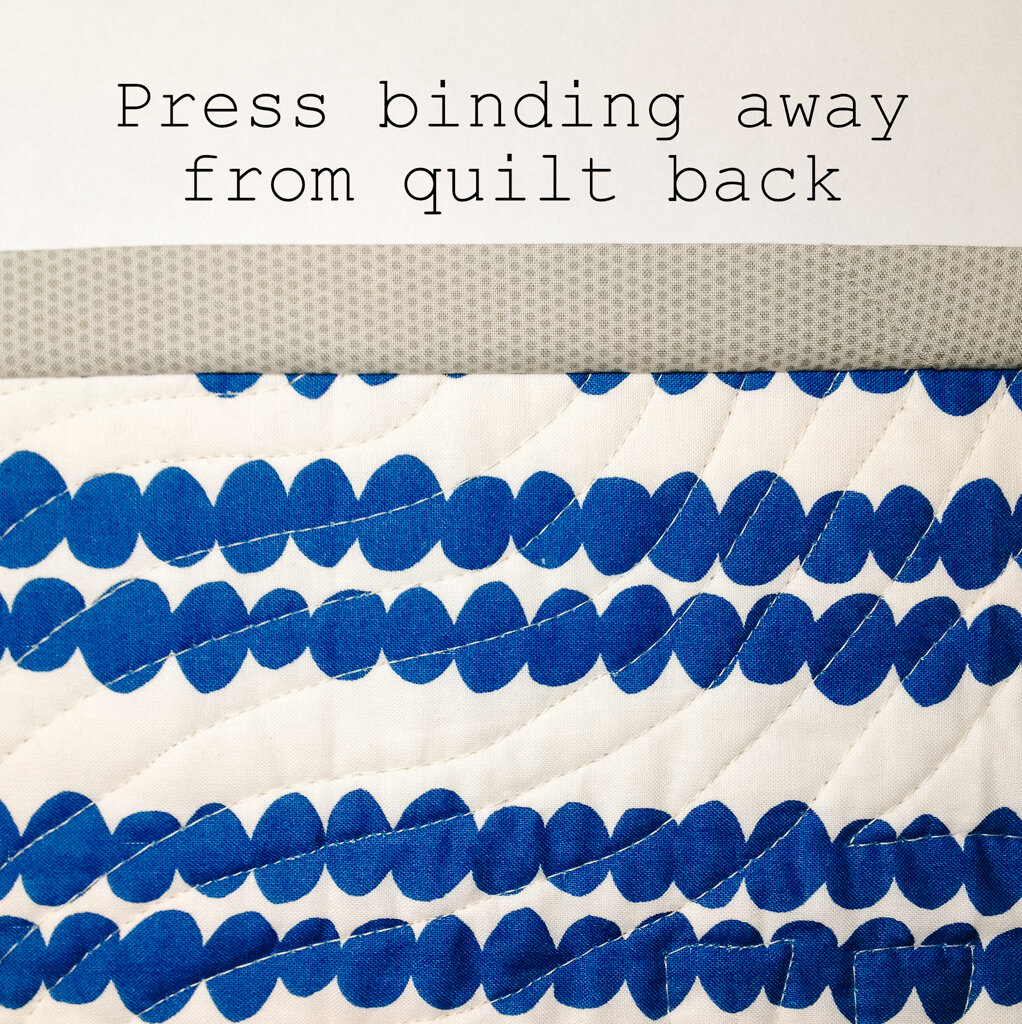
1. With the back of the quilt facing up, press the binding flat. Then, turn to quilt over, and press it as you fold it over to the front. If it is helpful, use a ruler to make sure you are folding the binding over evenly. I also press my corners, first on the back of the quilt, and then the front, fiddling with them if I need to so that the corner is nicely mitered.
2. Start at one of the corners, fold down both edges of the corner, and use Wonder Clips (or pins) to hold the binding in place. Repeat for the rest of the binding, or until you run out of clips/pins. I purchased mine on Amazon-- Clover Wonder Clips, 50 Per Pack

3. I use an edgestitch foot (Bernina #10 for my machine), or a zig zag, and slowly stitch along the edge of the binding on the front of the quilt. Start stitching on the corner--if your machine will let you stitch in place, do it here. If not, you can do a small back stitch or bury your knots at the end.
4. Sew the binding down, keeping your needle near the edge of the binding.
5. When you get to the corner, pivot your quilt (needle down). Repeat with remaining sides and corners. When you get to the very last corner, do another stay stitch, and celebrate!