
How to Make a Quilt Design Wall: A Tutorial

How to Make a Design Wall by Katie Blakesley swimbikequilt.com
In 2013, my husband and I made a design wall for my sewing space, which in our town house in Virginia was in the living room. We jokingly called it our every changing art installation. The design wall, made with 2 foot by 4 foot MDF boards (1/4’’ thick) and covered in gray flannel sheets, held up through 3 moves in 3 states, and countless quilt planning sessions. It still looked great 7+ years later, as you can see below.
How to Make a Design Wall by Katie Blakesley swimbikequilt.com
How to Make a Design Wall by Katie Blakesley swimbikequilt.com
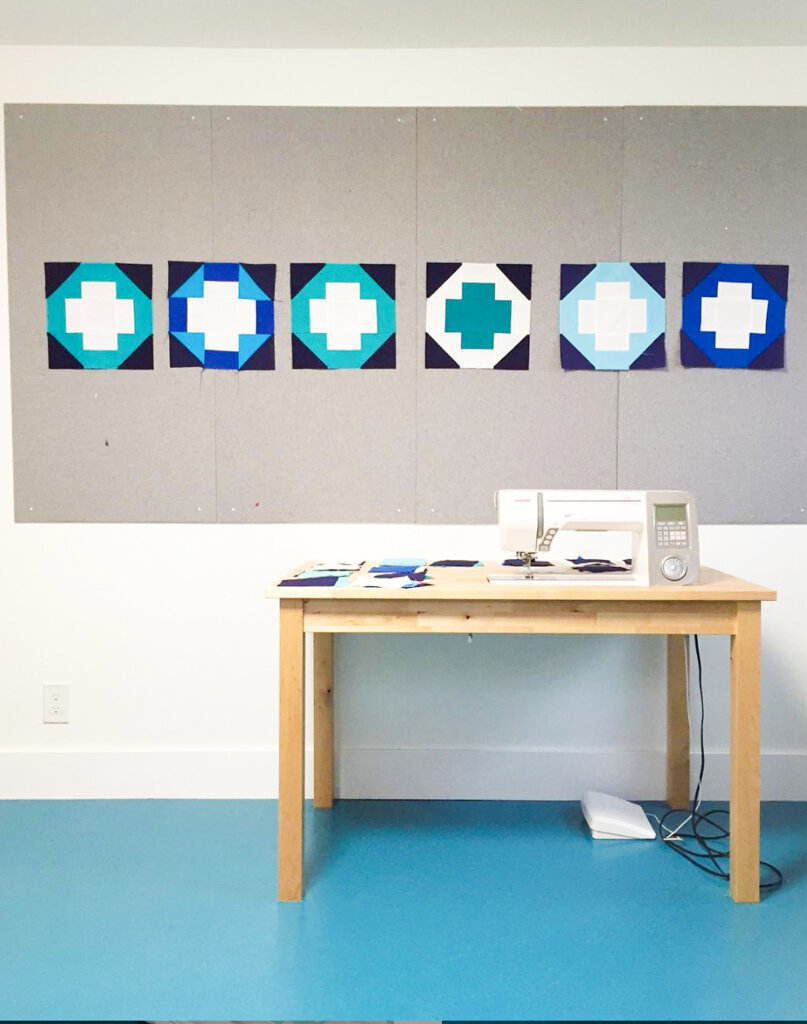
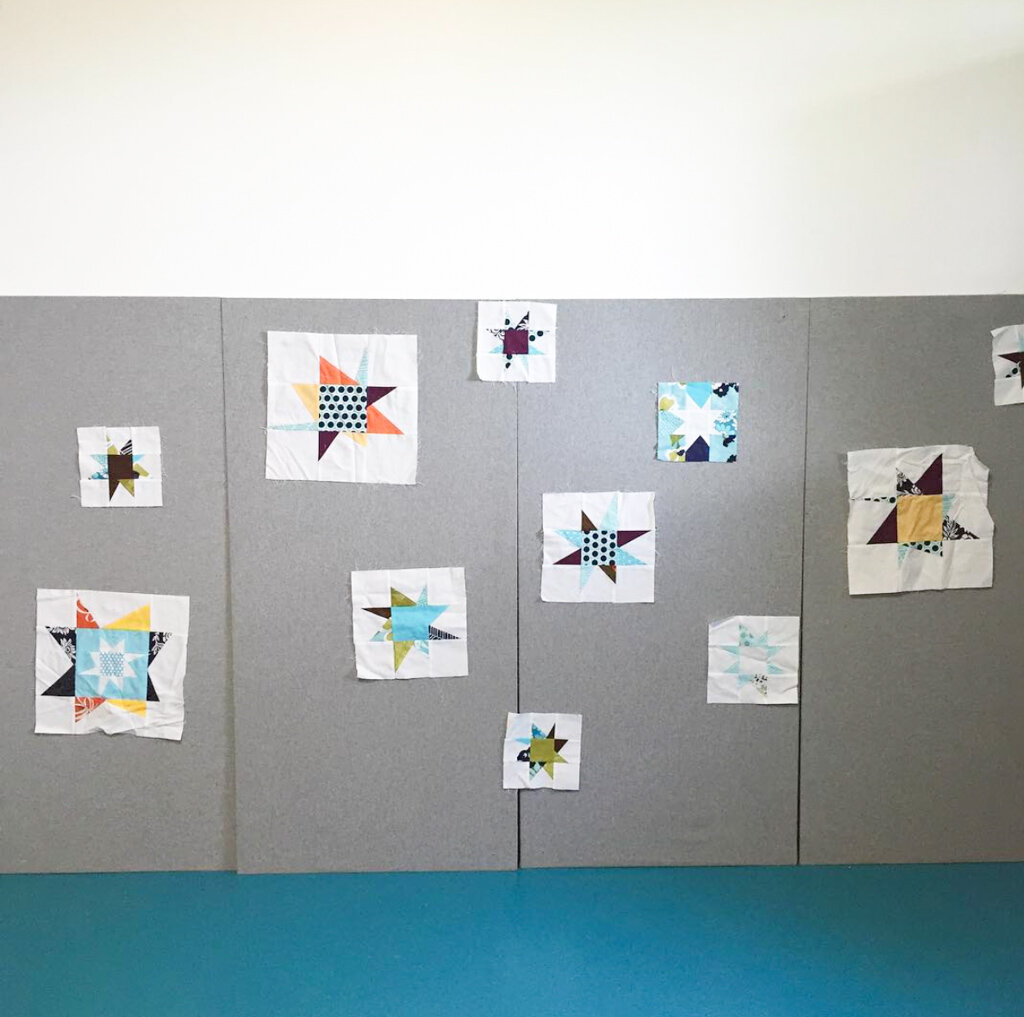
I have made a lot of large quilts lately, and have had to resort to taping the blocks on my wall, above and below the design wall, because the design wall just wasn’t big enough. When my parents asked what I wanted for Christmas, I knew immediately: help making a new, floor to ceiling design wall.
Fun fact: The flooring in my studio is marmoleum; it photographs differently based on the time of day/light/etc. Also, I have moved my sewing desk to another part of the room so that it isn’t in front of the design wall anymore.
How to Make a Design Wall by Katie Blakesley swimbikequilt.com
How to Make a Design Wall by Katie Blakesley swimbikequilt.com
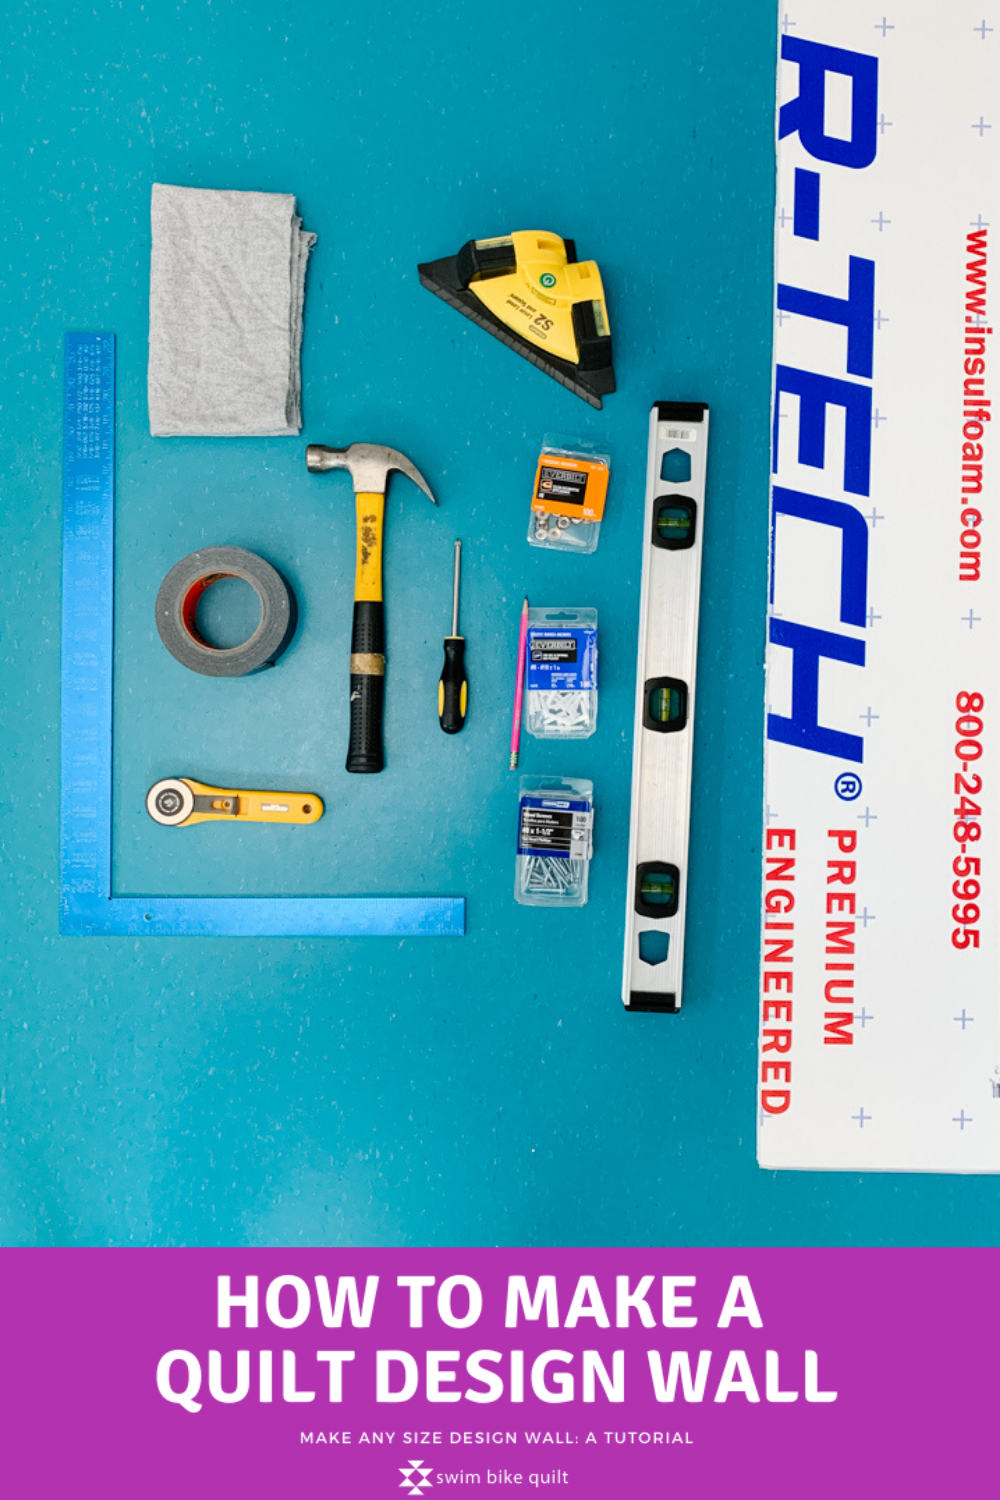
Materials
Insulated Foam Board—technical name: 1 in. x 4 ft. x 8 ft. R-3.85 Insulating Sheathing (~$12 a sheet)
Flat Flannel Sheet—I bought a King Flat Sheet from Garnet Hill in Heather Gray and it covered (2) 4’ x 8’ boards [search Paintbrush Flannel]
Rotary Cutter and large mat (not pictured)
Utility Knife (not pictured)
Square Ruler (and long quilting rulers if you have them)
Level and/or Laser Level
Hammer
Screwdriver
Screws [we used #8 Wood Screws, 1-1/2’’ long, with a few 2’’ screws in the studs]
Wall Anchors [we used #8-#10, 1’’]
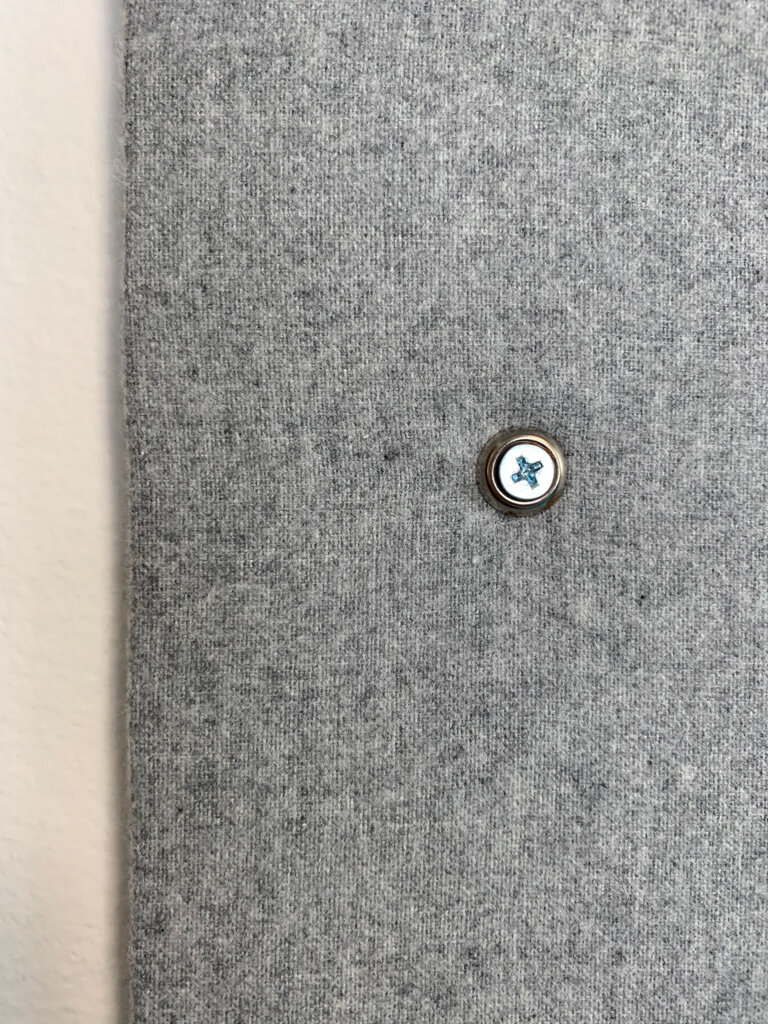
Finishing Washers [we used #8]
Phillips screwdriver
Hammer
Gorilla Tape
Pencil
How to Make a Quilt Design Wall with Insulation Board
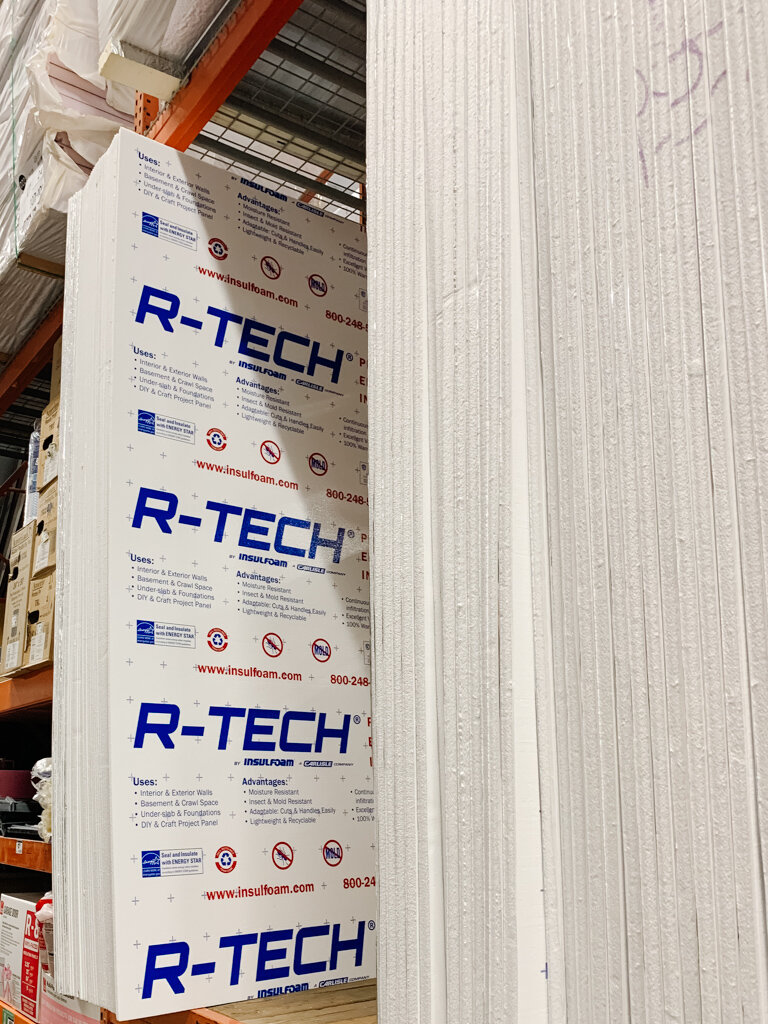
My dad bought this at Home Depot and transported it in his truck—one reason why my original design wall was made with 2’ x 4’ MDF board is because we drove a Prius at the time and didn’t have access to a truck.
Determine the available space/size of your design wall. I was hoping for (2) 4’' x 8’ design wall panels. My studio is in our basement, and a combination of super short ceilings and tall baseboards means my design wall is 7’ x 8’.
Determine if you need to trim the insulation board. We cut 1’ off of each board, using a metal square and quilting rulers, a pencil, and a utility knife.
Note: This is messy—the insulation board kind of just crumbles. You will need to vacuum a few times.
Also important—it is hard to get a truly clean cut. Determine if you want to use the trimmed side on the top, bottom, or side. We put the trimmed side along the baseboard because it was less noticeable. My floors and ceilings aren’t exactly square—welcome to my 1950’s basement.

How to Make a Design Wall by Katie Blakesley swimbikequilt.com
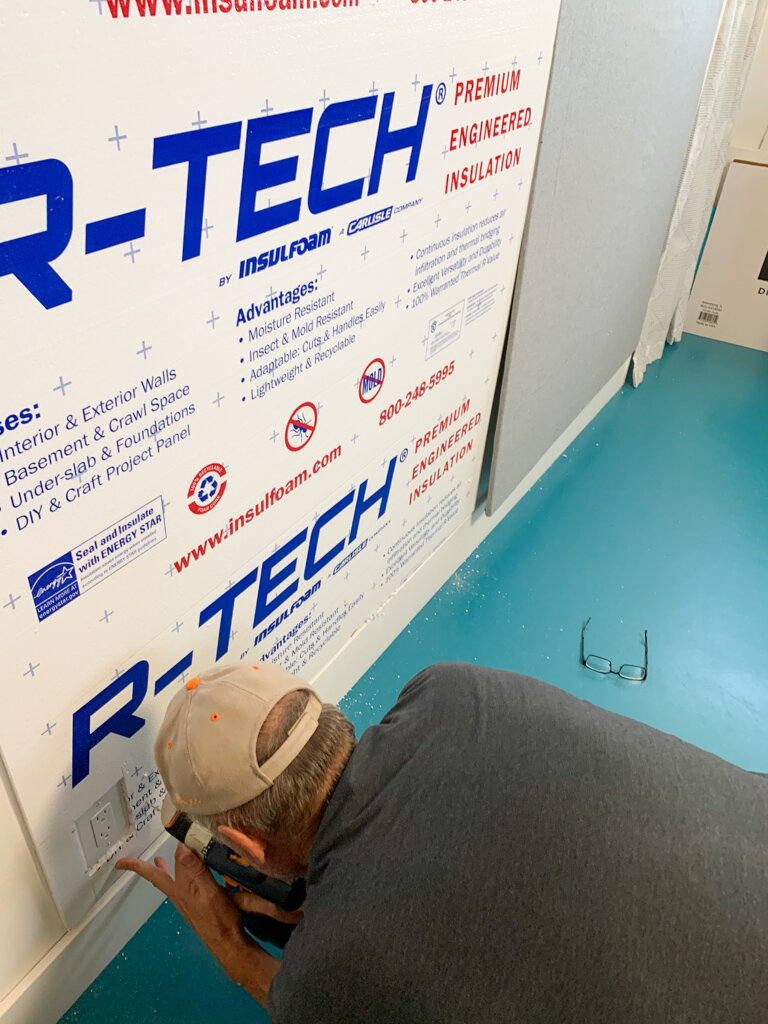
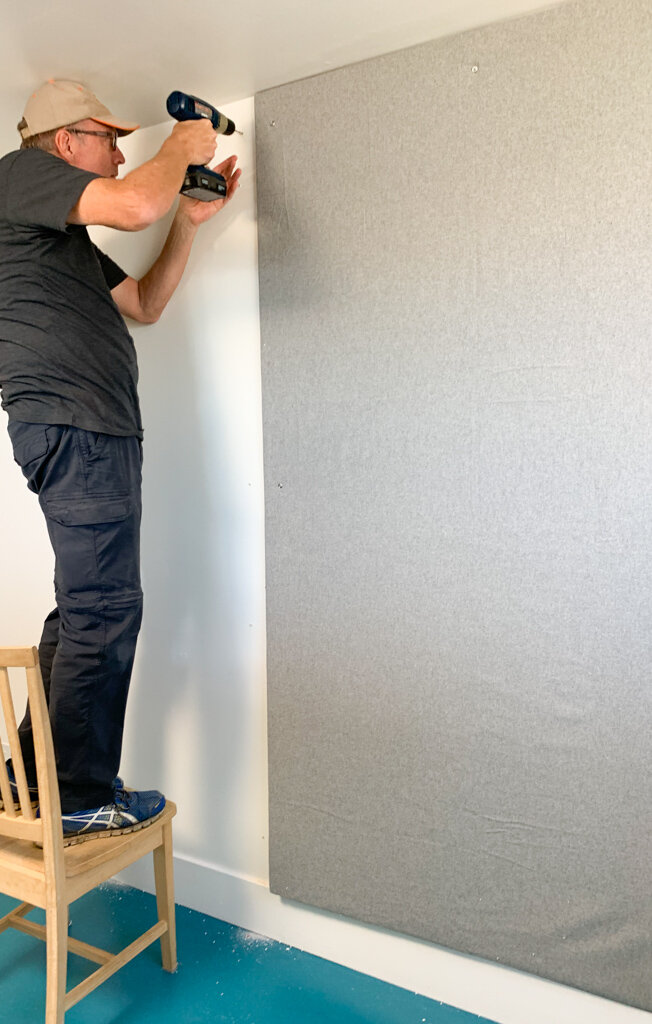
3. Before covering the boards in flannel, we pre-drilled the holes in the boards and the wall. We used the guides on the Insulation Board and drilled (2) holes in the top corners, (2) in the middle (along the edges), and (2) in the bottom corners. This is at least a two person job, one person to hold the insulation board in place, and one person to do the drilling.
Tip: If you have a light switch or outlet, it is pretty easy to just cut a hole in the installation board. Make sure to pre-drill holes around the outlet, as well.
Also, be aware that the guides on the insulation board might not match up for the two boards, if they weren’t cut in the same places when manufactured. We used the level and laser level to make sure that the screws all lined up.
How to Make a Design Wall by Katie Blakesley swimbikequilt.com
4. Prep the flannel. I used a king size flat flannel sheet (higher quality flannel than what I could buy at a fabric store, and the king size sheet didn’t have to be pieced). I did not use the hems, but rather cut them off in step 5. I also did not wash and dry the sheet, but I did press it before using covering the insulation board.
Tip: pay attention to whether the flannel sheet has two recognizable sides or not, and make sure to use the same side when covering the insulation board.
5. Cut the flannel to size. I found it easiest to lay the pressed flannel sheet on the floor, lay the insulation board reflective side up on top of it, and trim around the board using a rotary cutter, ruler, and mat. I left about a 2-1/2’'-3’’ flannel border on all sides, making sure to cut off the hems.
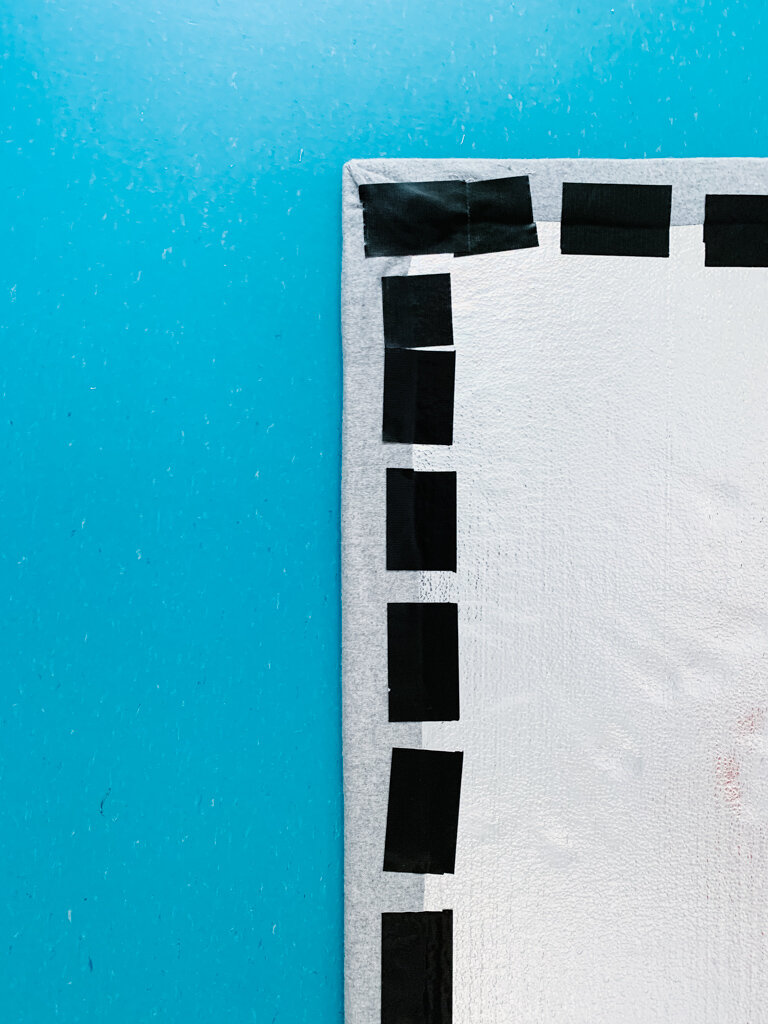
6. Cover the board in flannel—this was a two person job for us. We pulled the flannel tight around the board, and secured it using Gorilla Tape. We tried duct tape first, but liked the Gorilla tape better. We used 2-ish inch pieces of tape, and we used a lot of it! We started in the center on the first 8’ side, then worked our way to the corners. My dad pulled the flannel and taped it, and I sat opposite him, keeping the flannel taught. If you have ever taped a backing to the floor while basting a quilt, the process is similar. We repeated this with the opposite 8’ side. Next, we moved to the top 4’ side, starting in the center and moving towards the edges, and then the bottom (the trimmed side) 4’ side.
The corners are tricky—we saved them for last. I tried to fold them in like you would the corners when wrapping a present. It takes a bit of finessing to get them just right.
Repeat with any additional foam boards.
Tip: Pull the flannel tighter than you think you need to—in this picture, you can see that the flannel sags a little bit. We fixed it after the photo.
Tip: Make sure not to cover the pre-drilled holes with tape! We did that a few times, and had to peel off the tape.

How to Make a Design Wall by Katie Blakesley swimbikequilt.com
7. Put in the drywall anchors—you will not need one if you happen to hit a stud, like we did here, but you might need longer screws. You can tap the anchor with a hammer so that it is flush with the wall.
How to Make a Design Wall by Katie Blakesley swimbikequilt.com
8. Before you attach the flannel covered design wall onto the wall, you need to either cut a small hole in the flannel where the screw will go, or use the screw to make the hole.
9. Using a finishing washer and a screw, attach your design wall to the actual wall. I held the boards in place while my dad (pictured here) used a drill to drive the screws in, and then finished by hand. Thanks, Dad!
Note: You can see here the (now fixed) loose flannel—that is why I suggested that you pull the flannel tighter than you think you need to when taping it! We thought about taping the two boards together and covering the entire thing with the flannel (without a seam), but it was pretty unwieldy to maneuver, and we didn’t have any extra hands.

How to Make a Design Wall by Katie Blakesley swimbikequilt.com
How to Make a Design Wall by Katie Blakesley swimbikequilt.com

How to Make a Design Wall by Katie Blakesley swimbikequilt.com
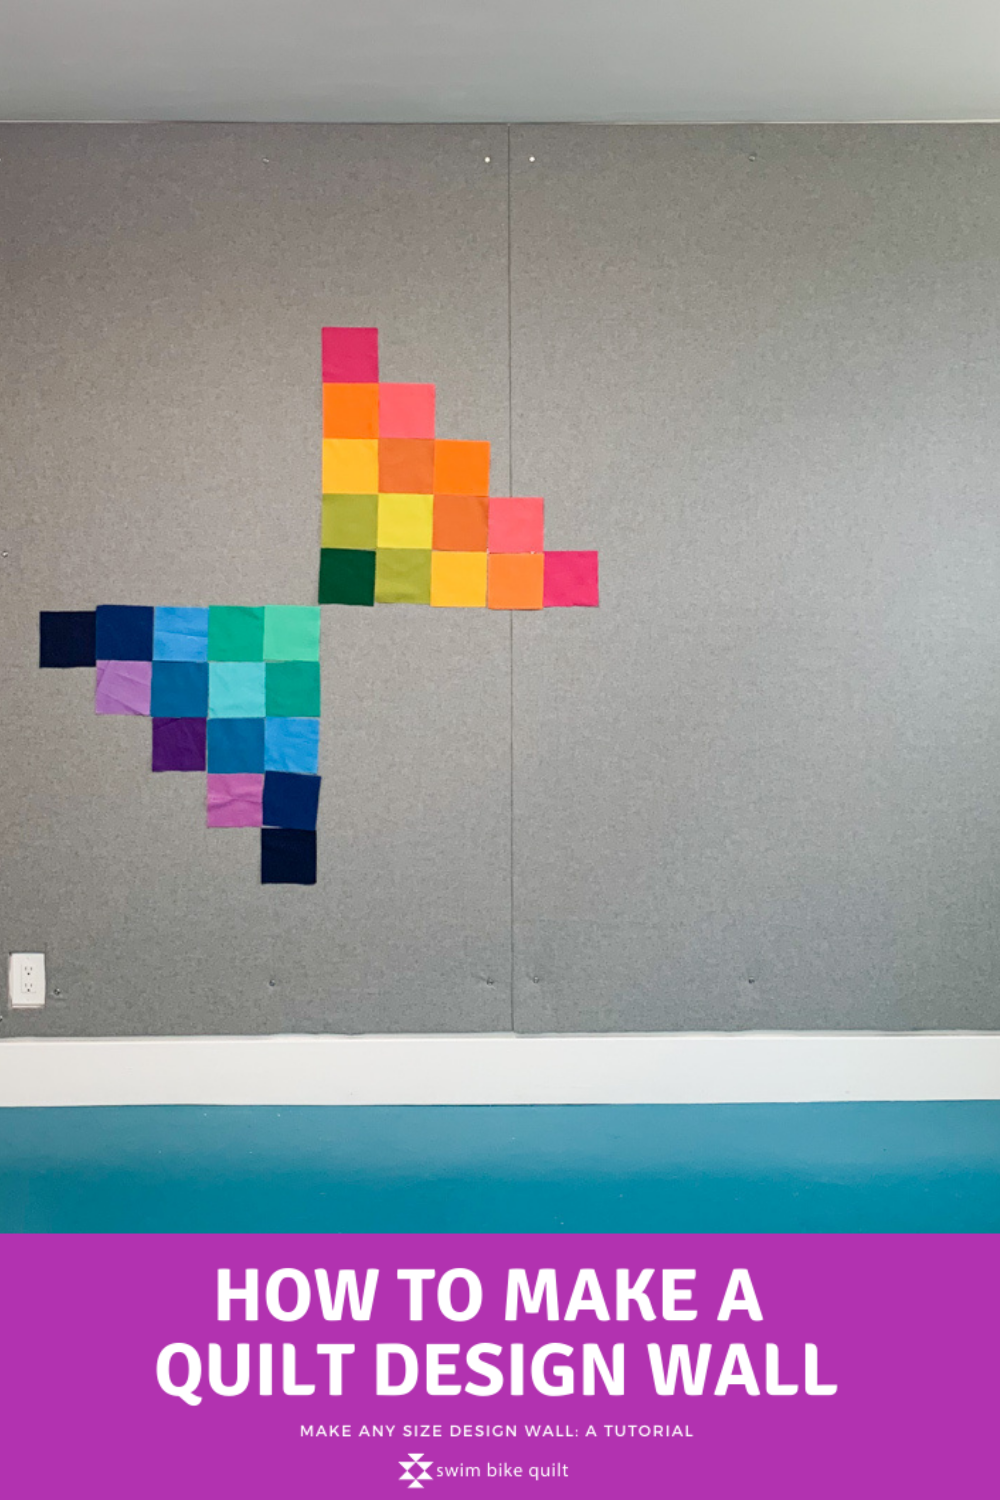
Ta da! I can’t wait to fill this design wall up!
You can use pins on this wall if you wanted to for any reason, but I wouldn’t lean on it frequently. The foam board is not as hardy as the MDF, and easy to leave an impression in the foam, say, if you leaned against it with your elbow pointed into it.
How to make AN MDF Quilt Design Wall
Why an MDF Design Wall?

How to Make a Design Wall by Katie Blakesley swimbikequilt.com
If you want something portable or for a smaller space, an MDF wall makes sense. The flannel covered boards stack easily against themselves, and you can move them behind a door or stack in a corner when you aren’t using them, which is what I did in my Portland house. The MDF board is heavy duty—if you knock into it or it falls over, it isn’t going to damage itself.
Cons—there are a number of seams in the design wall, as shown, and it is heavy! You probably don’t want to hang larger that 2’ x 4’ boards on a wall. Also, you can’t stick pins into the MDF.
Materials
(2-4) 2’ x 4’ MDF boards
flannel flat sheet (I’ve used both Bed Bath and Beyond and Garnet Hill sheets in Heather Gray)
staple gun + staples
gorilla tape or duct tape
refer to the main tutorial for the rest of the items (i.e. screws, screw driver, drill, etc).
Process
The process is much the same as the one mentioned above. We stretched the flannel very tightly across the front of the board and used a staple gun to attach the flannel to the back. We bought wide and shallow staples, and stapled the flannel to the MDF every inch or so. It might have been overkill, but we didn't want a sagging design wall. Jayme used a tack hammer to pound the staples flat, and we covered the staples with duct tape. We made a small hole in the flannel with scissors and used these screws to attach it to the wall.
How to Make a Design Wall by Katie Blakesley swimbikequilt.com