
100 Quilts for Kids Quilt Along: Assembling the String Blocks
 Today is the third post for the 100 Quilts for Kids Quilt Along. All of the posts can be found here:July 15: Quilt Along Introduction + GiveawayJuly 19: Materials + Cutting InstructionsJuly 26: Foundation Piecing the BlocksAugust 9: Assembling the Quilt TopAugust 16: Quilting TipsAugust 23: Quilting Tips from a Pro: Guest Post by Angela WaltersAugust 30: Finishing the quiltI have three goals for this Quilt Along: 1. Have fun 2. Don't think (too much) while sewing. 3. Donate your quilt! Totally achievable, right? That's what summer sewing is all about :)
![100 Quilts for Kids Quilt Along! [+ giveaway]](http://farm9.staticflickr.com/8291/7579630758_4a4dd7caa6_m.jpg)
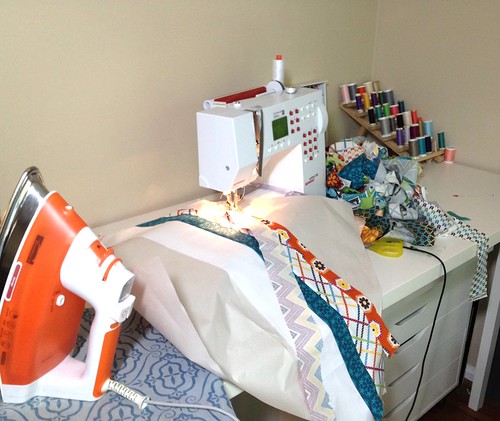
Assembling the String Blocks:1. Reduce the stitch length on your sewing machine. You want the stitches to perforate the paper, making it easy to remove later. [I change my stitch from a 2 to just above a 1 on my Bernina].2. Set up the iron near your sewing machine. I lower my ironing board so I can easily press blocks without getting up from my seat. (See that awesome ALEX Ikea cart with shallow drawers underneath my sewing table? I got one after visiting my sister-in-law and mother-in-law and discovering just how awesome it is. I just learned they made the top of theirs into an ironing station. Brilliant. I'm totally copying.)
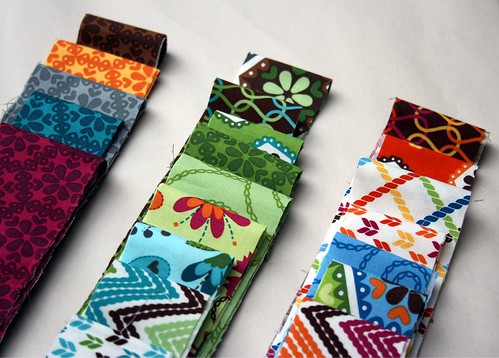
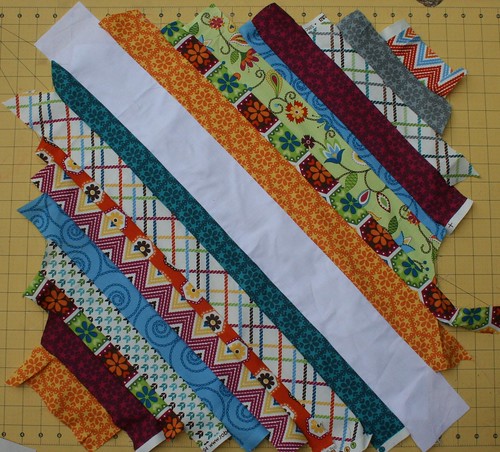
3. Organize (or at least lay out) your string blocks. Add in solids (or tone on tone prints, like those on the left) if desired.
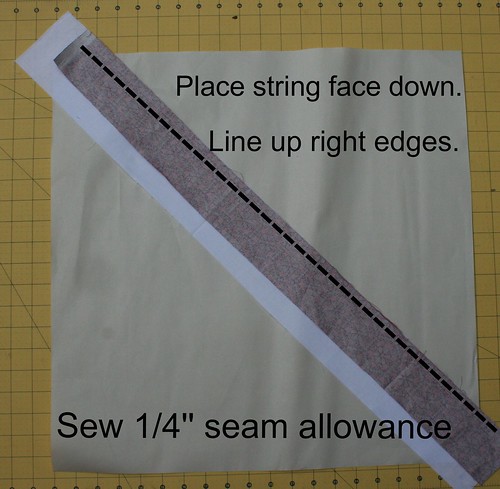
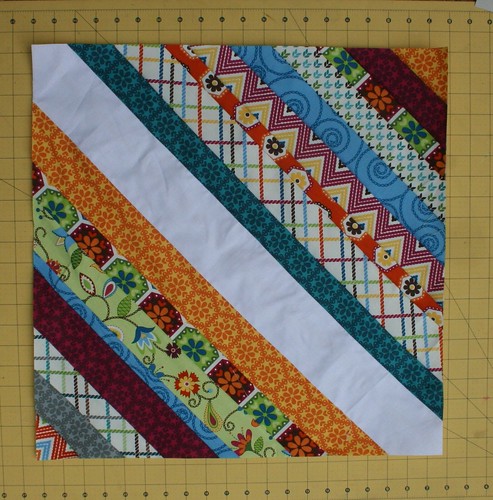
5. Place the next string face down, lining up the right sides. Stitch along the diagonal as shown above, using a 1/4'' seam allowance. Open and press seam. [Note: I like placing solids/nearly solids on either side of the white center string, but that is just a personal preference].6. Repeat step 5 until you have covered the right side of your block with strings.
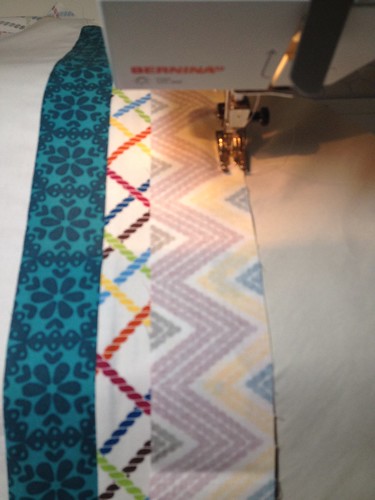
7. Repeat process for left side of the block--place first string face down, lining up left sides. Sew 1/4'' seam allowance on left side, open and press. Repeat until block is covered with strings.
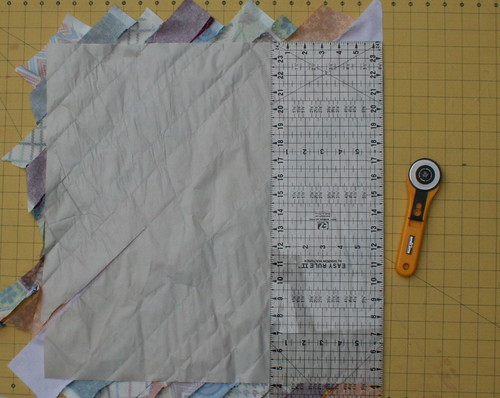
8. Turn block over. Trim around paper--block should end up 20'' or 12'' square, depending on which size block you are making. This one is 20'' square.
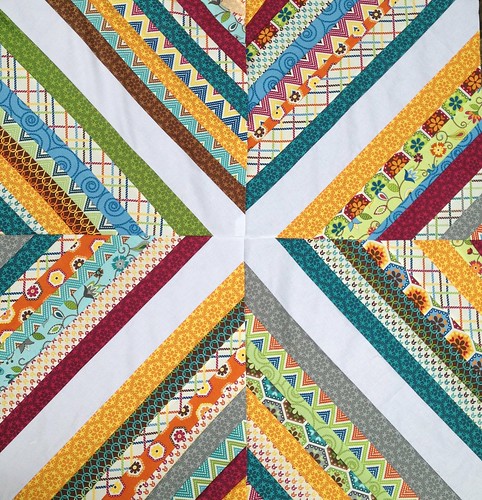
12. Repeat step 11 with the final 2 blocks, but instead, press to the right side.13. Place the block pairs right sides together, and pin. Take care to line up the edges of the center white strings so they match. Don’t worry about the rest of the strings, because they are randomly sized and placed, they aren’t supposed to match. Press well.
